The new king and queen of Artemesia are local to our Barony (Arn Hold) and are new friends of ours. The coronation festivities were to be held locally, so of course my husband and I decided to attend. Many of us were creating new garb for the occasion, and though I'm usually not able to attend clothier's guild I decided I needed something nicer, fancier, and more accurate to wear as I build my medieval wardrobe. My kingdom's colors are black and gold, and the new monarchs' colors are black and red, so I decided to go with gold and red as a little nod to both.
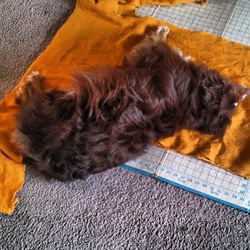
My miniature Australian Shepherd, Cody, really loves to help me sew. Most seamstresses have to make do with pins to hold their fabric down, but I am lucky enough to have a dedicated assistant to help! Here he is holding down the start of my new underdress. I used the same worksheets to guide me as for my first garb, this time with some lovely mediumweight linen (the color is Harvest Gold) from www.fabrics-store.com. Though I bought 5 yards of fabric, this used only 4. I could have skipped the full skirt, but the underdresses are really learning pieces for me, and I am still working to familiarize myself garment construction in a historical context. I may eventually make some quickie underdresses with slits on the sides instead of full skirts, and I also have plans for some fake underdresses for hot weather (just sleeve ends and a sort of dickie at the collar... Idaho is too hot for multiple layers in the height of summer, even just layers of linen).
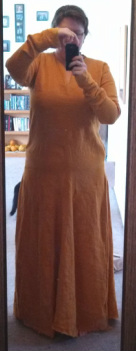
Here is an image of me in the finished underdress (note that I haven’t evened up or sewn the hem yet, so it looks a little off). I think the fit of this is a lot better than my first one because I had an epiphany about curves. I have a very hourglass figure (more than 10 inches difference between waist and hips) with a short torso and long legs. Remember how in my first garb the gores start basically right below my bust? That's because I didn't take into account the fact that my shoulders and bust would impact where the gore fell on my body.
It doesn't matter too much for an underdress, but I wanted this set of garb to be more true to the 12th-century silhouette with garments close-fitting through the whole torso and flaring only at the hips. I decided to figure the length of the gores by measuring from the fullest part of my hips to the floor instead of waist to the floor as directed in the handout here. That meant that with the reduction in length created by my bust and shoulders the gores actually sat right about at my natural waist, about 6 inches higher than the fullest part of my hips. I don't have a huge amount of experience with draping/drafting my own patterns, so I am learning a lot through this process.
I made the sleeves extra-long and scrunched at the wrist again, and because I am lazy (classy?) like that, I set up the sleeves so that each hem would be a selvedge edge so I didn't need to hem them. I actually really like the look.
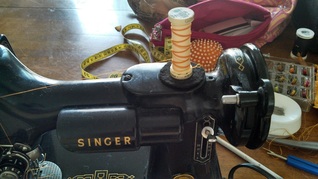
I ripped and sewed most of these seams several times, until I was only left with this much thread (after starting with a full spool). I decided that all the non-visible sewing would be done on the machine to save time. I went back later and stitched around the neck facing with red linen thread for a bit of embellishment (more later when time allows) and I hand-sewed the bottom hem as well (partly because I hate sewing hems on my machine). I also plan to flat-fell the seams, but I ran out of time to do that before Coronation.
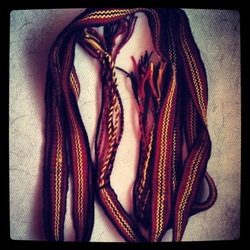
I used my rigid heddle loom to weave a five yard long belt to wear with my garb, long enough to wrap twice around the waist/hips and hang down decoratively to about my knees. I used leftover bits of gold, red, and black wool sock yarn from previous knitting projects, which worked well. This was my first warp-faced weaving project and it took some time to learn to pull the weft tight and beat it down securely with the shuttle. Those are both big no-nos in plain weaving, which is all I've done before. It was a fun learning experience, though, and I see lots more warp-faced weaving in my future. For my next project I hope to learn about pick-ups!
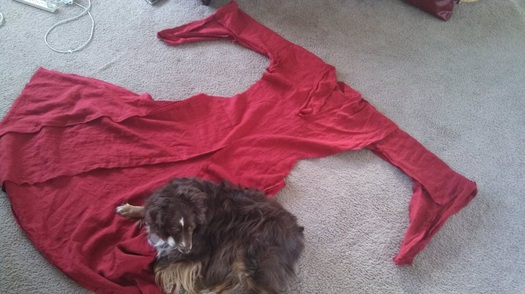
Here's Cody again, posing with my bliaut just after I finished all of the construction. I used most of five yards of 60" wide linen from fabrics-store.com which allowed me to be generous with the skirt. I followed the basic instructions on this page but learned a few things along the way worthy of note.
1) Due to my extreme curves, 10" (5 extra inches on front and 5 extra on back) was not enough to make waist scrunches. In fact, it was just about what I needed to ensure the dress was floor-length and no more. I ended up really liking the way it looked, but I will need to fiddle with things some more to make the waist scrunching work.
2) For the sleeve drape I made rectangles 10" by 20" so I wound up with triangles that were 5" on the short (sewed to the sleeve hem) side and 20" on the long side. Honestly, I will probably make even drapier sleeves next time, but I likely will go for more of an oblong/rectangle shape instead of a triangle.
3) I made the skirt gores as wide as they were tall. This led to a deliciously full skirt with about 20 feet of bottom hem. This is more fullness than I've done before, but I loved the look, and I will do it again.
4) I used 1 inch seam allowances on all pieces. That was probably overkill for the sleeve seams. I plan to line the sleeves eventually, so it's not an issue, but still. I wanted the 1" allowances so I'd have plenty of room for flat-felling the seams (see top image on this page for info on how). In fact, what I would probably do on the sleeve cuff pieces next time is make them twice as wide, fold them in half, and stitch them on that way. One less seam to finish and it would give the sleeves a bit of weight and drape.
4) I decided to be brave, follow the pattern (despite my misgivings) and try a slit neck. I will say that I don't like the suggestion to hem the neck slit rather than use a facing (especially with linen, which has a tendency to rip and fray rather badly), and that I tried the slit neck on and it looked really odd and messed up the fit of the sleeves. At that point I had a bit of a freak out because I had just cut a major slit in my dress and I didn't like the results. I laid it flat and cut out a v-shaped neckline that worked for me, though I feel it's a bit longer than I would have liked. I then used a spare scrap of fabric to sew on an after-the-fact facing, which looked and felt much better, IMHO.
5) Instead of trying on the dress to determine lacing placement I laid it out on the floor. I had previously figured out bust, waist, and hip circumferences as directed in the pattern. At the point where the gores started the dress was already at hip width. Below the underarm gussets I marked the fabric so it was half of my bust measurement (centering on the torso). Halfway between that and the start of the gores I marked the fabric to be half my waist measurement. I didn't use seam allowances because I knew I wanted some negative ease in the torso. I then drew straight lines from bust to waist, and waist to hip, then cut out the sides of the fabric.
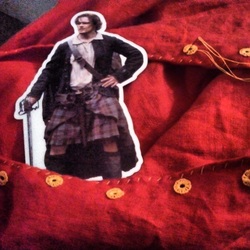
6)I hand-stitched the neck facing, cuff hems, and side hole hems with yellow linen thread. Then I hand-sewed eyelets every two inches from underarm to hip on the sides. That was a LOT of sewing, and next time I will know I need at least two spools of thread. I ran out and had to use a bit of sewing machine thread (four strands held together) to finish up. Here is a photo of PocketJamie (from the upcoming Starz TV rendition of Outlander) with the endless eyelets. I finished them at about 1 am on the morning of coronation, so no other seams got finished. I machine-hemmed the bottom of the skirt in the morning before the event. I plan to go back later and redo it by hand so it looks halfway decent.
7) Despite planning for negative ease through the torso (no seam allowances, approx. 3/4 inches on each side of each piece for hem, eyelets set in another half inch or so) the torso was too lose. I think I lost some weight between starting and finishing the construction. At some point I will go back and re-hem one side of each piece and (sigh) sew new eyelets so that I can get the torso fit more snug.
8) I plan to line the sleeves with some of the extra yellow linen from my underdress. I think it will add a real bit of extra drape to the fabric, and it will certainly be prettier than looking at the seams inside. I will most likely lay a sleeve on a piece of paper and trace the shape from the flare down and use that to draft a pattern for lining pieces, then tack them in by hand with hemstitching.
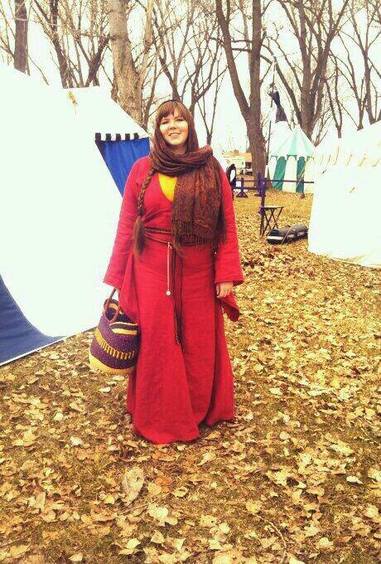
I need to take a few more photos of the final outfit, but here is a photo from the morning of the event (before the rain started). The basket was a gift from a friend, it was made by a local refugee artisan weaver. It’s one of those things that looks period enough not to disrupt the feel of the event. The headrail is a pashmina I've had for years with a paisley jacquard pattern. I'm not sure of the material, but I think it's a wool blend. It matched my colors nicely, kept me warm, and kept me from being so indecent as to go around with a bare head (see next pic for more evidence that I can't seem to leave anything on my head alone for long. This is true in my mundane life as well). The pattern isn’t precisely period, but it did the job.
I received lots of compliments and the dress was comfortable, but I still need to finish all the seams of both dresses, re-hem the red one, and line the sleeves. I also want to add some more embellishment to spice things up a little... not sure what that will be yet. Beads, embroidery, applique... we'll see!
I received lots of compliments and the dress was comfortable, but I still need to finish all the seams of both dresses, re-hem the red one, and line the sleeves. I also want to add some more embellishment to spice things up a little... not sure what that will be yet. Beads, embroidery, applique... we'll see!
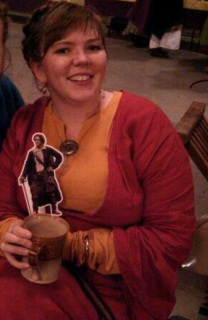
Here's another shot of me (again with PocketJamie) where you can see just how deep the neckline is, and the pewter pin (a souvenir from my aunt's trip to Norway) I used to hold the underdress neckline closed. This also shows the extra-long scrunched sleeves on the underdress too.
 RSS Feed
