Well. I must say, this dress felt like an impossible task for a simple early period girl like me, but with much encouragement from my friends in the Arn Hold Clothiers' Guild and throughout the kingdom, I girded my loins and decided to try it. Between grad school and working full time, this was the only project I planned to tackle in the second half of 2014, and I didn't really start on it until after Thanksgiving.
The first step was buying the fabric. My husband and I planned matching garb, and since we are not as rich as the Florentine hoi polloi, we settled on this synthetic brocade which was on clearance at Home Fabrics for $5 a yard. It's actually pretty good for a synthetic in terms of period-looking pattern, etc. We purchased ten yards for the two of us, and I think my dress probably ended up taking about six.
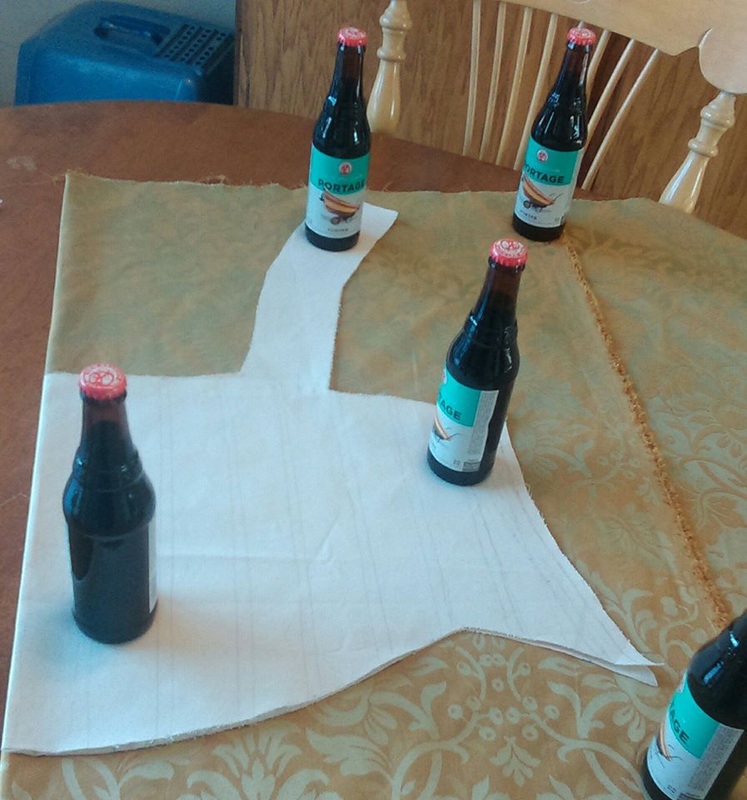
The first step was to make a bodice mockup based on my measurements. I relied heavily on this website as far as taking the measurements went, and which ones to take. Then I used wrapping paper to make a pattern, and since my figure is kind of complicated (big difference between bust and waist) and because this is my first time with anything like this, I cut out several mockups from an old sheet, pinning/sewing, cutting, resewing, etc. until I got the shape I wanted. Unlike the drawing on the website above, I had to angle the straps in the front and back to get them to go across the point of the shoulders, so seen from above they actually make a V shape, with the points pointing away from my neck.
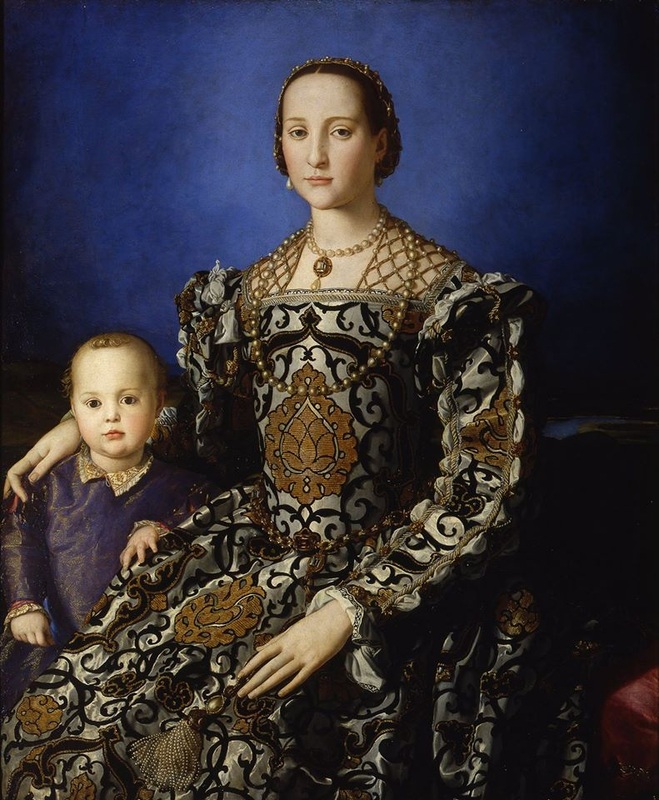
Because I have a bit of a tummy and a short torso I thought the slightly longer bodice with the curve at the bottom in the above image of Eleanora de Toledo by Bronzino would be more flattering on me than the slightly earlier pictures with waistlines at the natural waist. I didn't want to make an exact replica, but the shape of the bodice and the use of a big pattern motif appealed to me.
The first step was buying the fabric. My husband and I planned matching garb, and since we are not as rich as the Florentine hoi polloi, we settled on this synthetic brocade which was on clearance at Home Fabrics for $5 a yard. It's actually pretty good for a synthetic in terms of period-looking pattern, etc. We purchased ten yards for the two of us, and I think my dress probably ended up taking about six.
The first step was to make a bodice mockup based on my measurements. I relied heavily on this website as far as taking the measurements went, and which ones to take. Then I used wrapping paper to make a pattern, and since my figure is kind of complicated (big difference between bust and waist) and because this is my first time with anything like this, I cut out several mockups from an old sheet, pinning/sewing, cutting, resewing, etc. until I got the shape I wanted. Unlike the drawing on the website above, I had to angle the straps in the front and back to get them to go across the point of the shoulders, so seen from above they actually make a V shape, with the points pointing away from my neck.
Because I have a bit of a tummy and a short torso I thought the slightly longer bodice with the curve at the bottom in the above image of Eleanora de Toledo by Bronzino would be more flattering on me than the slightly earlier pictures with waistlines at the natural waist. I didn't want to make an exact replica, but the shape of the bodice and the use of a big pattern motif appealed to me.
After five mockups I had a shape I liked. I cut it at an angle from the back of the underarm down to a few inches out from my spine to do side back lacing. Next I traced my finished pattern onto some cotton canvas and some spare polka dot cotton fabric with half inch seam allowances (For future, 1/4 inch allowances would be enough, and would have saved me some steps. ) and some extra length in the straps. On the advice of the ladies who taught our class, I took in each side of the front and back piece by an inch in the center, drawing a curve from that point to where the top and bottom started, so that when laced, the bodice would draw in under my bust and provide some support while helping avoid extra bagginess under the bust, since there are no darts and I am quite hourglass-shaped.
I know the debate about whether the Italians wore corsets rages on. My thought is that the dresses were more likely to have had internal stiffening, and if you look at Eleanora's torso, there's not a wrinkle in sight. I decided to bone my bodice with heavy duty zip ties (the ones I got were 48" long and about 3/8" wide). Based on the class I took, the size and flexibility of these zip ties is pretty similar to whalebone, and holds up well to repeat wearings.
I think next time instead of two layers of material I'd use grosgrain ribbon sewn down to make channels. This woul dmean one less layer to sew and make the dress hot. Here is how I drew out and sewed the boning channels for the front/side piece. The lines are 1/2" apart, to give the boning room to go in. I cut the boning to size (1" shorter than the channels, since they include seam allowance) with pruning shears, and tried to snip off any sharp points (though next time I would take the time to cut them into curves). Below is a photo of the boning plan.
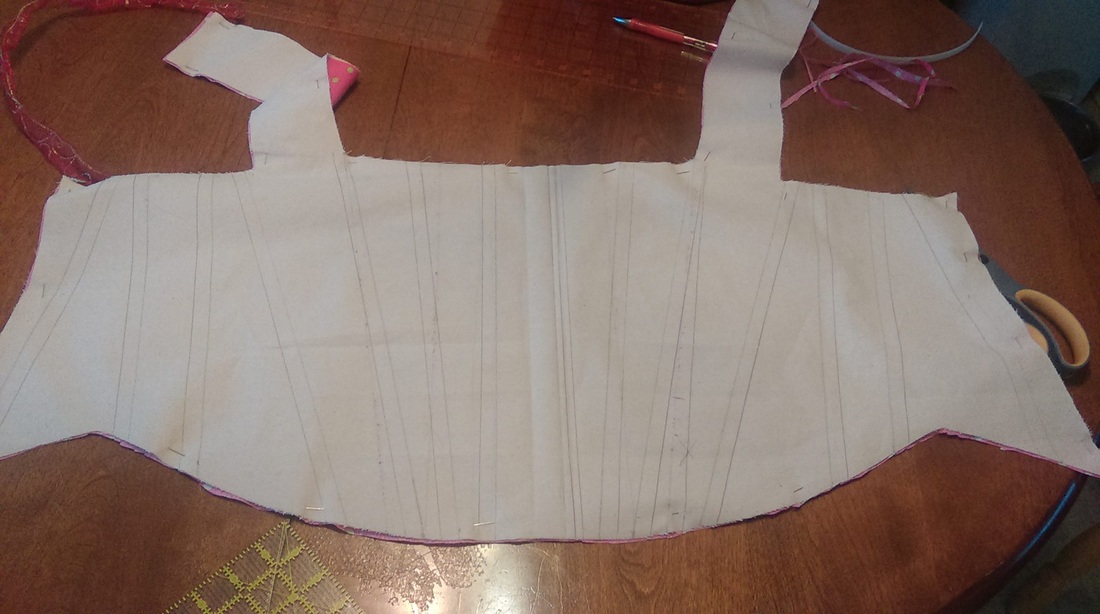
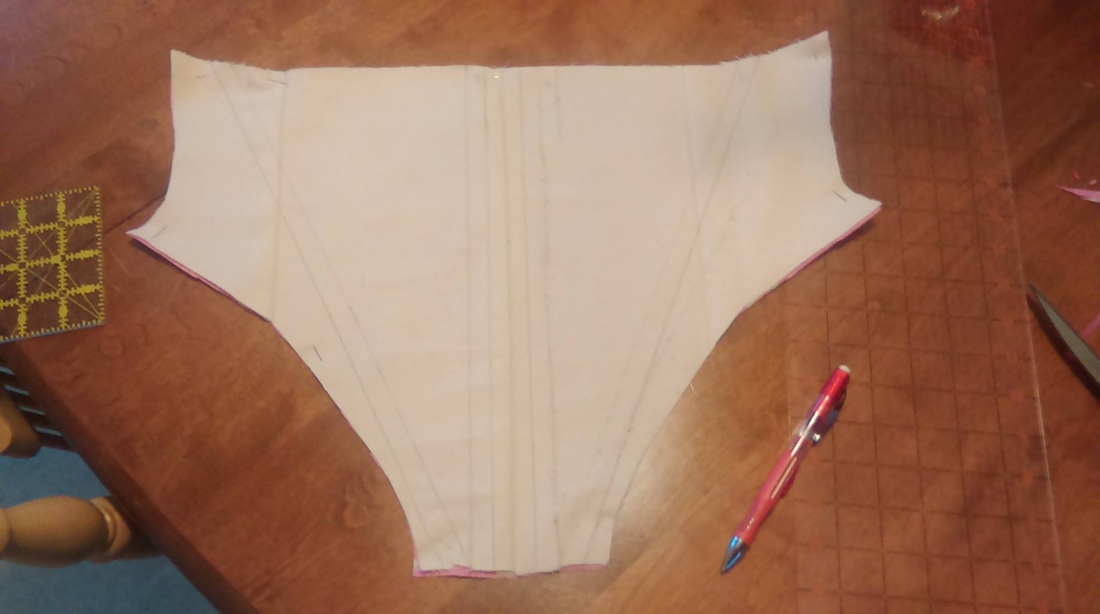
Here is the front piece and back piece with the boning complete. After sliding the boning into the channels I ironed the whole thing to take the curve out of the zip ties, which worked great. Here you can see the exterior fabric in the upper left corner, and also the fun polka dots. You can see the back piece only has four bones, two down the center and one at each side at an angle. The small amount of space at the bottom proved to be tricky when it came time for eyelets. My next dress will likely be side laced just so I can get in and out of it on my own.
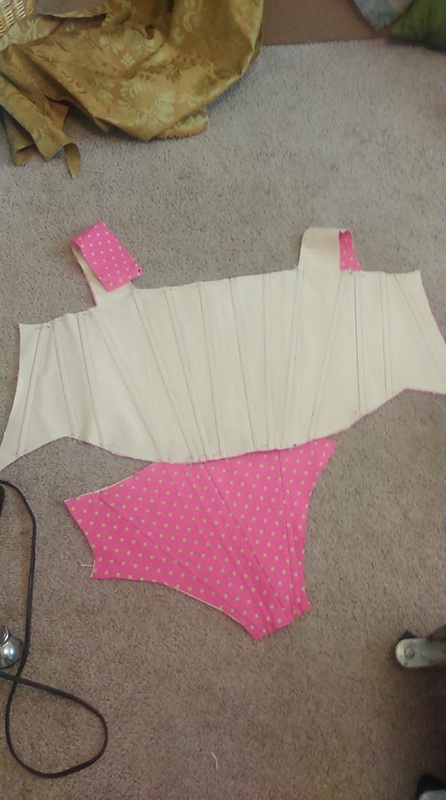
To these layers I added gold linen lining on the inside, and thin cotton quilt batting (to stop the boning showing through) topped with the brocade on the outside, having cut out the bodice so that the main pattern motif (which was directional and symmetrical) was centered in front and back. Below is a photo of my innovative use of pattern weights to hold everything in place when I cut the brocade. ;) Then a photo of everything put together. I left the bottom edge of the front and the top edge of the back open to turn them right sides out.
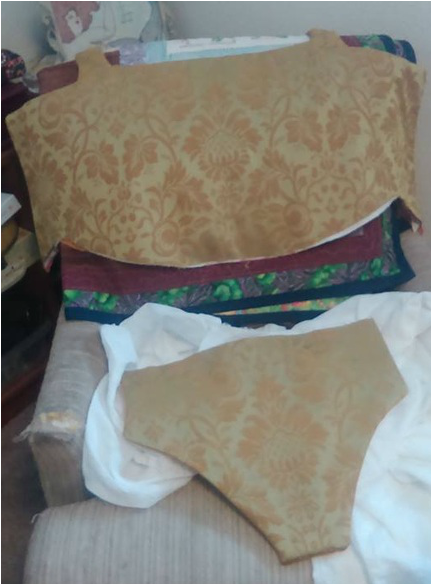
I shared that photo on facebook and so many people thought the back piece was a big pair of knickers that I've decided I will eventually make myself some out of the leftover fabric. Teehee.
Anyway, the next step was to sew eyelets along the edges of the front and back. I didn't bother about having a bone in between the eyelets and the edge of the bodice, since the bodice isn't meant to reduce me at all, and five layers of material in the seam should be pretty strong. I used cotton embroidery floss for my eyelets, and did them every two inches along each side, except at the top on the back piece, where there is only a one inch gap between the first two (so I can spiral lace). Every inch would have been more period, but that's a LOT of eyelets.
Once I had the holes in I was able to try on the bodice and figure out where to set the straps. My hubby helped with this step, which was to cause trouble later. I said I NEED A DRESS DUMMY so many times in this process that I'm planning to make a duct tape one soon.
I attached the straps by hand and hand-finished the top of the back and bottom of the front piece by turning the raw edges of the lining and brocade in and whip stitching them. I had to trim down the lining layers to make this work, and I should have cut them smaller to begin with.I also should have cut the lining fabric slightly smaller so that the brocade wrapped around the edge to make sure the lining didn't show. If I do this project again, I'll do the clipped self bias tape edging and sew that in around the top and bottom of the bodice, but I decided to forego it for my first effort.
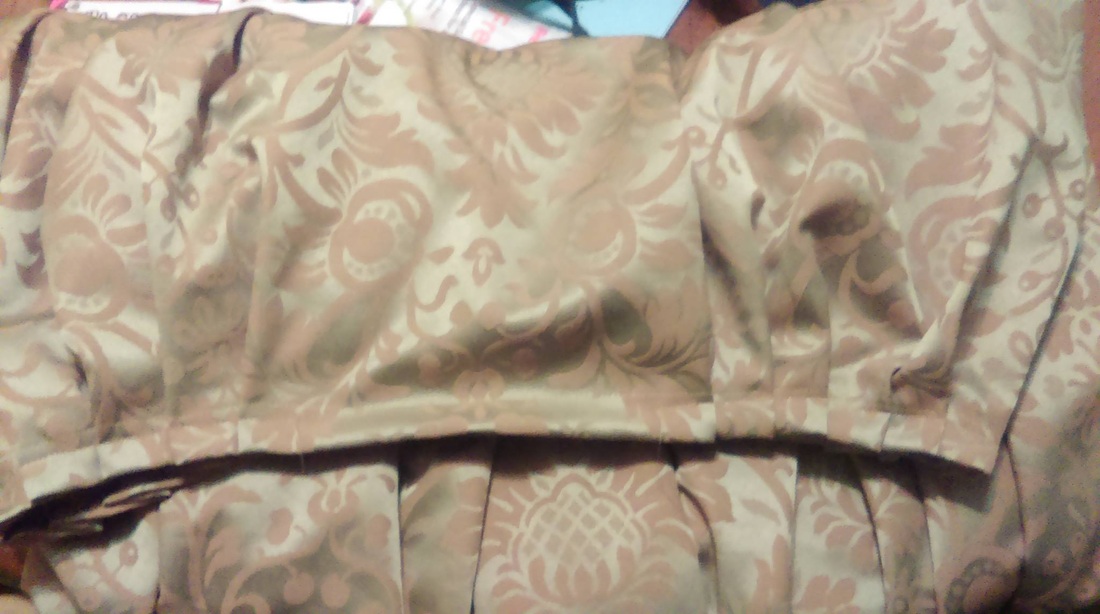
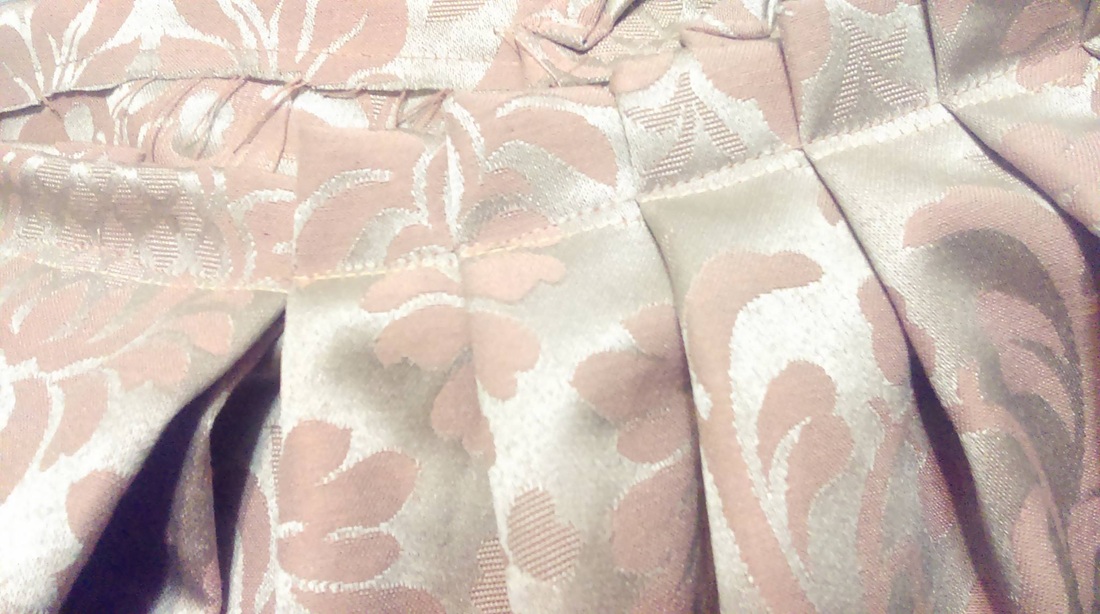
The next step was the skirt. After studying Eleanora's portrait it looked to me like there was a small section in the center front where there was no pleating, to showcase her lovely fabric. Since the rest of the skirt isn't readily visible in the portrait, I decided on a six inch section at the center front that would be smooth, then knife pleating all the way around the sides, and a double box pleat at the back (the width of the bottom of the back bodice piece) to give a little fullness there and make the skirt trail behind me nicely. I measured from natural waist to floor and added a few inches for seam allowances, then cut panels from my fabric from selvedge to selvedge (yay no seam finishing!) until I had roughly three times the measurement of my waist. This turned out to be just about right for a nice full skirt, but for box pleats or more knife pleats I certainly could have added more in, or put in a couple gores. This page has great info on period pleats. I sewed up the sides to make a big tube, then folded the edge down and stitched that.
I started with the center back and pinned the box pleat first, the width of the lower back piece (I think it was about four inches. Then I found the center front and marked the section to stay flat. I figured out the remaining amount of waist band inches and the remaining amount of fabric inches and then basically eyeballed pleats to take up that fabric, which wound up being knife pleats about one inch wide. I made these going away from the center front. Once I had all the pleats pinned I did a line of machine stitching over them and pressed.
Here's a photo of the front of the skirt, showing the flat panel and the knife pleats, Below that is one of the back with the double box pleat on the left side, held open to show the two folds.
Anyway, the next step was to sew eyelets along the edges of the front and back. I didn't bother about having a bone in between the eyelets and the edge of the bodice, since the bodice isn't meant to reduce me at all, and five layers of material in the seam should be pretty strong. I used cotton embroidery floss for my eyelets, and did them every two inches along each side, except at the top on the back piece, where there is only a one inch gap between the first two (so I can spiral lace). Every inch would have been more period, but that's a LOT of eyelets.
Once I had the holes in I was able to try on the bodice and figure out where to set the straps. My hubby helped with this step, which was to cause trouble later. I said I NEED A DRESS DUMMY so many times in this process that I'm planning to make a duct tape one soon.
I attached the straps by hand and hand-finished the top of the back and bottom of the front piece by turning the raw edges of the lining and brocade in and whip stitching them. I had to trim down the lining layers to make this work, and I should have cut them smaller to begin with.I also should have cut the lining fabric slightly smaller so that the brocade wrapped around the edge to make sure the lining didn't show. If I do this project again, I'll do the clipped self bias tape edging and sew that in around the top and bottom of the bodice, but I decided to forego it for my first effort.
The next step was the skirt. After studying Eleanora's portrait it looked to me like there was a small section in the center front where there was no pleating, to showcase her lovely fabric. Since the rest of the skirt isn't readily visible in the portrait, I decided on a six inch section at the center front that would be smooth, then knife pleating all the way around the sides, and a double box pleat at the back (the width of the bottom of the back bodice piece) to give a little fullness there and make the skirt trail behind me nicely. I measured from natural waist to floor and added a few inches for seam allowances, then cut panels from my fabric from selvedge to selvedge (yay no seam finishing!) until I had roughly three times the measurement of my waist. This turned out to be just about right for a nice full skirt, but for box pleats or more knife pleats I certainly could have added more in, or put in a couple gores. This page has great info on period pleats. I sewed up the sides to make a big tube, then folded the edge down and stitched that.
I started with the center back and pinned the box pleat first, the width of the lower back piece (I think it was about four inches. Then I found the center front and marked the section to stay flat. I figured out the remaining amount of waist band inches and the remaining amount of fabric inches and then basically eyeballed pleats to take up that fabric, which wound up being knife pleats about one inch wide. I made these going away from the center front. Once I had all the pleats pinned I did a line of machine stitching over them and pressed.
Here's a photo of the front of the skirt, showing the flat panel and the knife pleats, Below that is one of the back with the double box pleat on the left side, held open to show the two folds.
Next, I marked along the inside of the bodice where my natural waist was, and pinned the skirt along there. I knew this was going to be a bit fiddly because of my low curved front. If I had a straight waist-length bodice I could have just attached the skirt with my sewing machine, right sides together.
So, I pinned the skirt in along the natural waist line. Then, I pinned the skirt close to the lower edge of the bodice, and, girding my loins, cut a shallow U-shaped piece (will add a photo of this when I can) away from the front of the skirt between the natural waist and the bottom of the bodice (leaving about an inch of overlap). I didn't want all the extra bulk around my waist of leaving the front of the skirt in there. Then I hand stitched the skirt to the bodice, using the finished edge of the skirt where possible, then turning down the raw edge and stitching that when I got to the section that was cut. I also cut a six inch slit on either side of the box pleat and hemmed each side, so I can get in and out of the dress, and reach for a pocket (aka a saccocia) when I have one. I would like to add a hook and eye to each of the slits, but haven't done so yet. (Will add pics of inside of the bodice where skirt is sewn and of the slits soon).
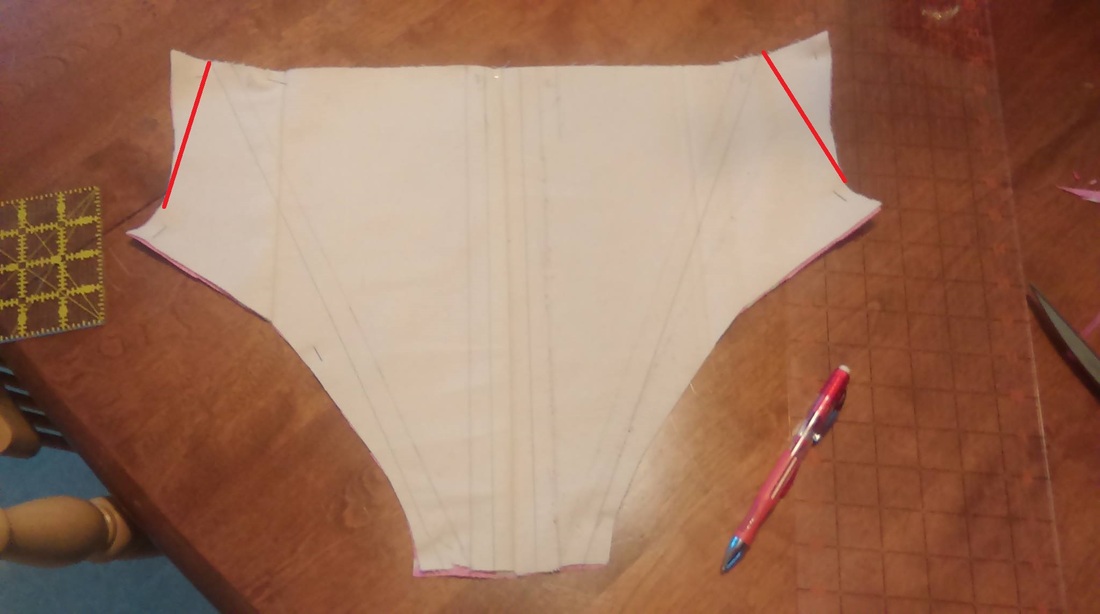
At this point, the hardest part was over. I put the finished dress on and admired my handiwork, only to realize that the back was too wide and gaped out at the top, and the straps I had made extra long just in case were actually too long. Sigh. I had a fit at this point, threw the dress in a corner, and went to bed, but the next morning I once again girded my loins, ripped open the top of the back, removed the straps, and cut off about an inch from each top corner down to the underarm This was a bit nerve-wracking for me, but I did it. Then I trimmed the straps down, sewed them back in, and finished the edges of my back piece where they were open. It was so gratifying that the problem was fixed since it was quite scary to cut a basically finished dress open. I should have cut the underarms slightly lower to give my arms more movement. This has been the biggest challenge to wearing this dress.
Here's an image to show approximately where I cut on my finished bodice back.
So, I pinned the skirt in along the natural waist line. Then, I pinned the skirt close to the lower edge of the bodice, and, girding my loins, cut a shallow U-shaped piece (will add a photo of this when I can) away from the front of the skirt between the natural waist and the bottom of the bodice (leaving about an inch of overlap). I didn't want all the extra bulk around my waist of leaving the front of the skirt in there. Then I hand stitched the skirt to the bodice, using the finished edge of the skirt where possible, then turning down the raw edge and stitching that when I got to the section that was cut. I also cut a six inch slit on either side of the box pleat and hemmed each side, so I can get in and out of the dress, and reach for a pocket (aka a saccocia) when I have one. I would like to add a hook and eye to each of the slits, but haven't done so yet. (Will add pics of inside of the bodice where skirt is sewn and of the slits soon).
At this point, the hardest part was over. I put the finished dress on and admired my handiwork, only to realize that the back was too wide and gaped out at the top, and the straps I had made extra long just in case were actually too long. Sigh. I had a fit at this point, threw the dress in a corner, and went to bed, but the next morning I once again girded my loins, ripped open the top of the back, removed the straps, and cut off about an inch from each top corner down to the underarm This was a bit nerve-wracking for me, but I did it. Then I trimmed the straps down, sewed them back in, and finished the edges of my back piece where they were open. It was so gratifying that the problem was fixed since it was quite scary to cut a basically finished dress open. I should have cut the underarms slightly lower to give my arms more movement. This has been the biggest challenge to wearing this dress.
Here's an image to show approximately where I cut on my finished bodice back.
At this point my husband put the dress on (which was hilarious), but I don't think I should share that photo with you.
All that was left was sleeves, hemming the skirt, and embellishment. I had my hubby help me pin up the edge of the skirt to the right length to just brush the floor, since this dress was for dancing. I cut the skirt about four inches too long, which made it very easy to cut a two inch strip of felt and slip it into the hem, then wrap the fabric up around it, then down into the crease to make a nice wee sandwich. This finished the edge and all that is visible inside and out is the brocade. This technique was used in period to give the skirt some fullness at the bottom and keep it from pulling between the legs,, and it's very easy on this type of skirt because the bottom edge isn't curved, so no need to curve the strips of felt either. I sewed this down with a machine, and moved on to the sleeves.
Using this guide for reference I measured the length from the point of my shoulder to wrist, and from underarm to wrist, and my arm circumference at these points. I added in two inches for ease and seam allowance, and wound up with this shape (folded in half), which I cut out with help from my cats. I hemmed the wrist and the upper, and sewed the underarm closed. I opted for simpler sleeves than Eleanora's gown, especially because of my limited skill with this. I simply cut a slit from about four inches from the top of the shoulder to about four inches above the wrist, sewed a rolled hem around this, and added some black grosgrain ribbon bows to hold it closed. I also sewed black grosgrain ribbon ties to the shoulder straps and tops of the arms to attach the sleeves. I'll add a few more photos in for that stuff too, when I get a chance.
Finally, I hand stitched on some trim a friend brought back from Pennsic for me. It is a strip of black velvet ribbon
 RSS Feed
