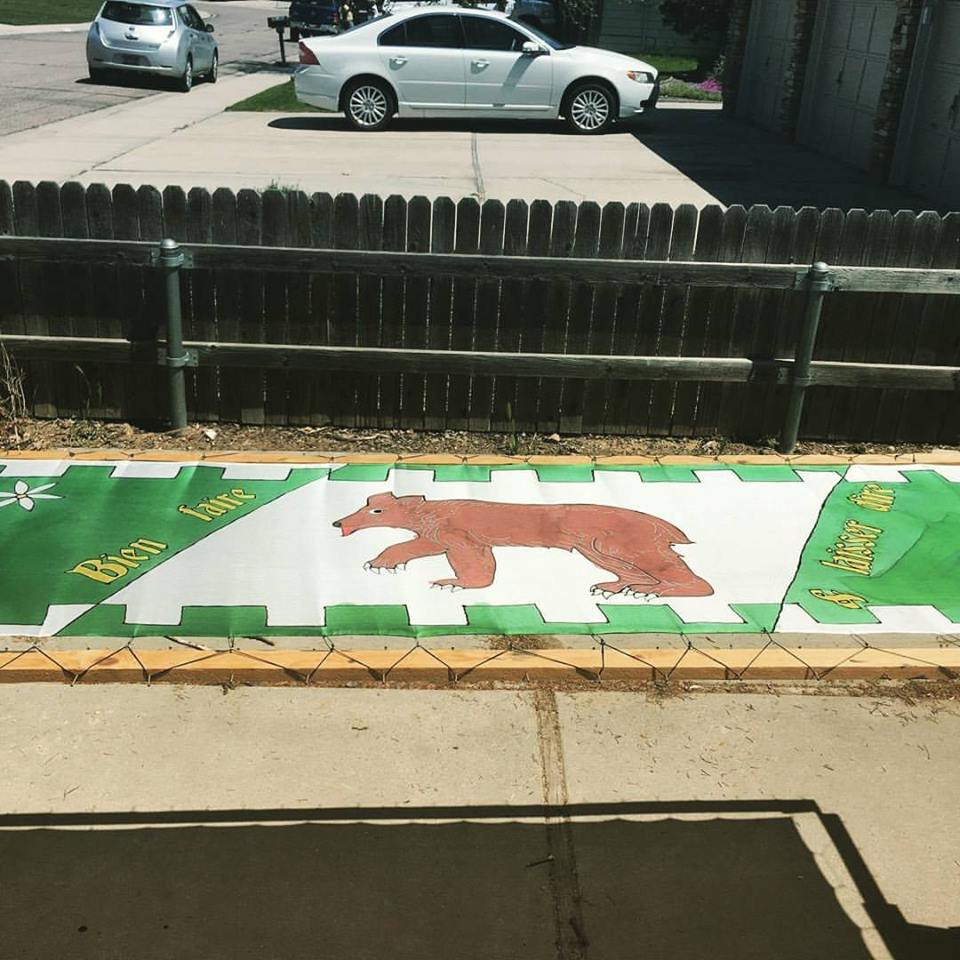
About a month ago our Barony held a banner-making day to help members display their heraldry at the upcoming Artemisia Twenty Year event. I made a banner several years ago, but have since changed my arms a bit, learned a bit more about banners in period, and picked a motto I like, which is a customary addition to devices in these parts once one becomes an armiger. The motto is a French saying (appropriate for my Norman persona, eh?), bien faire et laisser dire, which means "do good works and let them talk." Good, eh? I think it's a good fit for my personality. I'd rather roll my sleeves up and get to work on what interests me, and leave the gossip/drama/idle chatter to others.
Mistress Gilliana and Master Braden from our local group have a pretty good system ironed out for silk banners. We use the 20x72 inch silk scarves from Dharma Trading Co., along with their gutta and acid dyes. Participants sign up ahead of time and pay for the scarf to use and chip in on dye that we all share. They own probably eight frames (built from 1x1s, corner brackets, and small nails), and the other supplies needed. There's a lot of good info and discussion on the process on the Stayner de Silk Facebook group for interested folks.
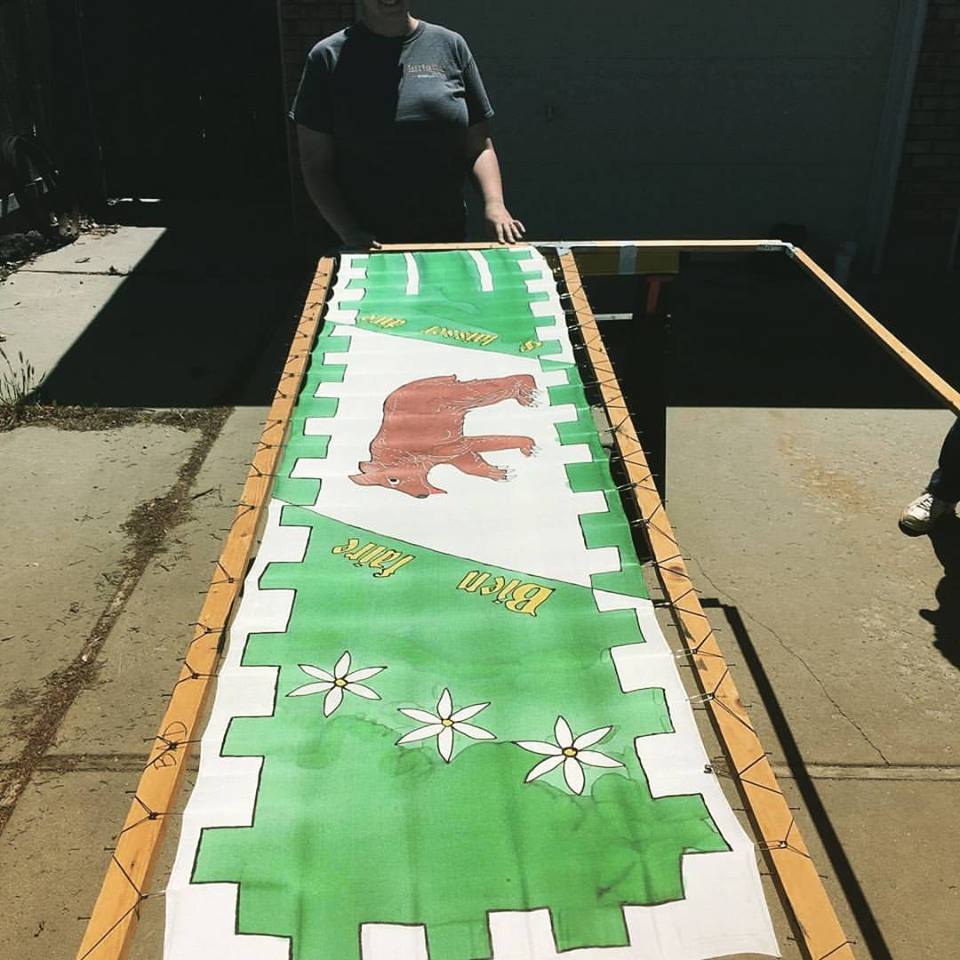
I cheated a bit by printing out large black and white images of the bear, garlic flowers, and crenellation from my device, along with a typed out version of my motto in a period-looking font, then traced them onto the banner in pencil ahead of the actual painting session. The silk is then stretched on a frame and gutta is used as a resist to trace outlines and prevent dye from bleeding. The gutta is left to dry, and afterwards the dyes are painted on. We always do these sessions on nice dry sunny days so the gutta and dye will dry well, but that creates an issue when filling in large areas. If the dye's leading edge is allowed to dry, it creates a line in the finished colored section that's impossible to fix. This is annoying, and inevitable, even when working in teams.
I've since learned it's possible to avoid this by wetting the scarf (after gutta has dried) with a mix of rubbing alcohol and water, the same solvent used to dilute the dyes. You can even carry a spray bottle with this mix in it to keep the scarf wet while working. Oh well. Live and learn.
Anway, the scarves are then rolled in paper to prevent bleeding, steamed to set the dye, and rinsed. Here's a few images of my banner before steaming. Can't wait to get it up in the air and fluttering! You'll notice I didn't bother with the more traditional/historic practice of including kingdom/baronial/household affiliations and award insignia. I did this on my last banner, but I wanted one that was just all about Ursula!
Mistress Gilliana and Master Braden from our local group have a pretty good system ironed out for silk banners. We use the 20x72 inch silk scarves from Dharma Trading Co., along with their gutta and acid dyes. Participants sign up ahead of time and pay for the scarf to use and chip in on dye that we all share. They own probably eight frames (built from 1x1s, corner brackets, and small nails), and the other supplies needed. There's a lot of good info and discussion on the process on the Stayner de Silk Facebook group for interested folks.
I cheated a bit by printing out large black and white images of the bear, garlic flowers, and crenellation from my device, along with a typed out version of my motto in a period-looking font, then traced them onto the banner in pencil ahead of the actual painting session. The silk is then stretched on a frame and gutta is used as a resist to trace outlines and prevent dye from bleeding. The gutta is left to dry, and afterwards the dyes are painted on. We always do these sessions on nice dry sunny days so the gutta and dye will dry well, but that creates an issue when filling in large areas. If the dye's leading edge is allowed to dry, it creates a line in the finished colored section that's impossible to fix. This is annoying, and inevitable, even when working in teams.
I've since learned it's possible to avoid this by wetting the scarf (after gutta has dried) with a mix of rubbing alcohol and water, the same solvent used to dilute the dyes. You can even carry a spray bottle with this mix in it to keep the scarf wet while working. Oh well. Live and learn.
Anway, the scarves are then rolled in paper to prevent bleeding, steamed to set the dye, and rinsed. Here's a few images of my banner before steaming. Can't wait to get it up in the air and fluttering! You'll notice I didn't bother with the more traditional/historic practice of including kingdom/baronial/household affiliations and award insignia. I did this on my last banner, but I wanted one that was just all about Ursula!
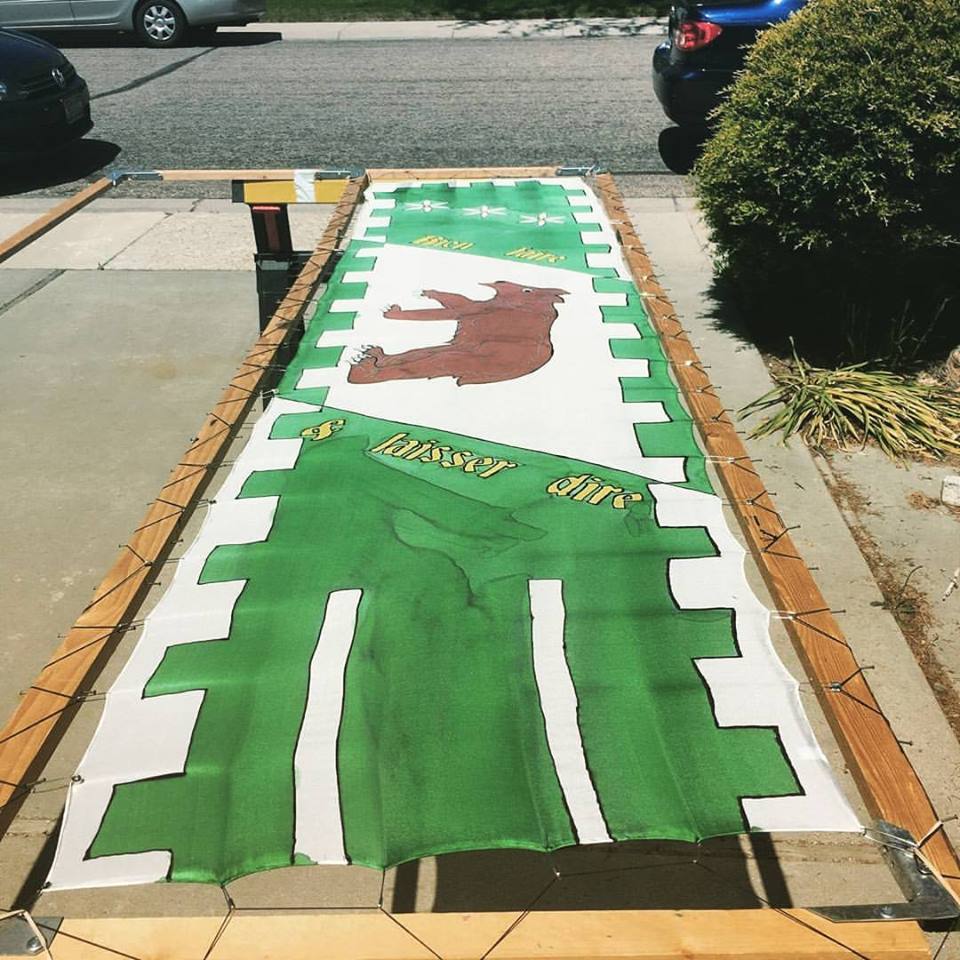
Note: the white strips at this end will actually be cut out, leaving three tails at the end to flutter in the breeze. You can really see the lines in the dye I was writing about above. They aren't a big deal, but they do annoy my perfectionist nature, as do the little drips/bleeds that always seem to happen.
 RSS Feed
