Well, I can proudly say that Sir Brynjolfr's trousers are finished well before the Memorial Day deadline we agreed on. I am probably going to see him at Honor War in a few weeks, so I can bring them for him to try on in case of any modifications. For now, though, here's the finished trousers. I used my serger on these since hand-sewing wouldn't even be visible, and I wanted them to be machine-washable and sturdy.
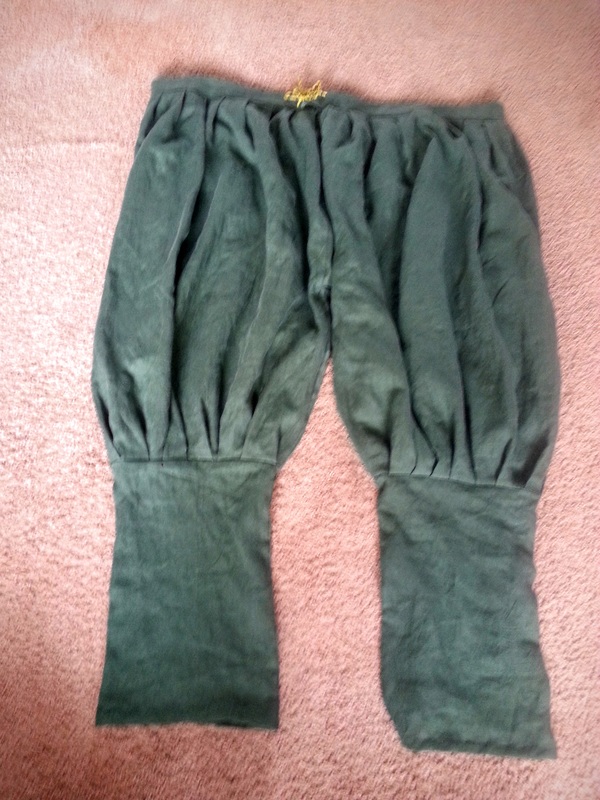
They are based on the style known in the SCA as Rus trousers, which actually seems to have been pretty common throughout the Viking world. There are lots of images of men wearing full trousers that appear creased or pleated, which come in below the knee for a tight fit.
I have to say a huge thank you to my husband, Lord Aonghus, who helped me struggle through these. He gave me all the source info I could possibly ask for, and helped keep me on track (check out his references on his Norse Garb pinterest board). It was at his suggestion that I make the lower leg portion full-length instead of just a shorter strap/cuff below the knee. He said these pants were sometimes worn without leg-wraps, and that they are more comfortable and stable with leg wraps if the trousers go all the way down.
The waist band is made of a double-folded strip of linen, eight inches wide. Aonghus says he makes his trousers so that each leg is twice as wide ashis thigh measurement. I went with the full width of the linen, since I had enough, it was close to that measurement, and it was easy to measure/cut. The thigh pieces are attached by a crotch gusset that runs from the front waistband to the back, and is a couple inches longer than the client's rise. The bottom leg sections are about two inches larger than his calf, and should reach to the ankle.
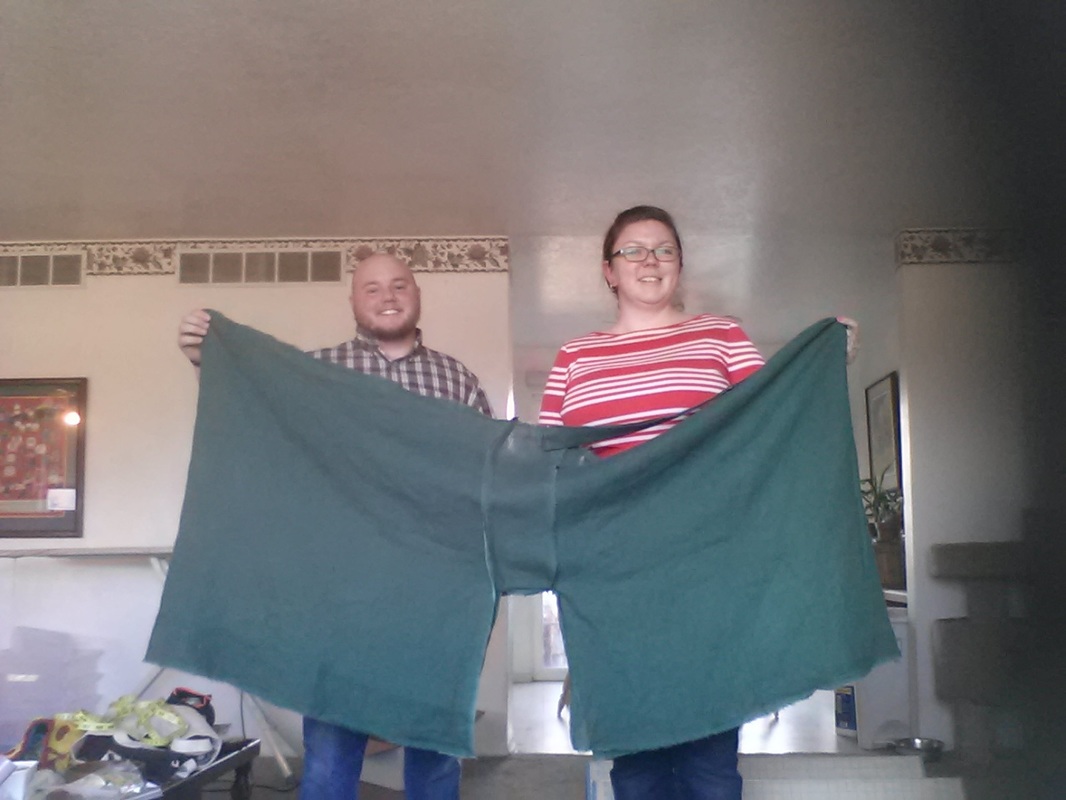
Below is a photo of the full width of the trousers. It kind of makes me think of those before/after weight loss photos with someone holding their giant old pants.
I have to say a huge thank you to my husband, Lord Aonghus, who helped me struggle through these. He gave me all the source info I could possibly ask for, and helped keep me on track (check out his references on his Norse Garb pinterest board). It was at his suggestion that I make the lower leg portion full-length instead of just a shorter strap/cuff below the knee. He said these pants were sometimes worn without leg-wraps, and that they are more comfortable and stable with leg wraps if the trousers go all the way down.
The waist band is made of a double-folded strip of linen, eight inches wide. Aonghus says he makes his trousers so that each leg is twice as wide ashis thigh measurement. I went with the full width of the linen, since I had enough, it was close to that measurement, and it was easy to measure/cut. The thigh pieces are attached by a crotch gusset that runs from the front waistband to the back, and is a couple inches longer than the client's rise. The bottom leg sections are about two inches larger than his calf, and should reach to the ankle.
Below is a photo of the full width of the trousers. It kind of makes me think of those before/after weight loss photos with someone holding their giant old pants.
The waist band was made about two inches longer than Sir Brynjolfr's waist. I then pleated the pants into the waistband by marking halves, quarters, etc. until I had about one inch pleats. I did the same thing with the trouser legs where the lower leg connects. A lot of the construction of these pants was based on conjecture, since actual period examples are really scarce. Many reenactors have made similar pants without adding a waist band by simply folding over the top of the pants and adding a drawstring. My experience of wearing garments like that is that they're uncomfortable. The gathered material shifts around, feels baggy, makes clothes look rumpled on top, and can be kind of a pain to get in and out of. I made a waist band for comfort and ease of wearing, but I think it's a plausible addition to a pair of pants, and likely will never be seen by anyone except Sir Brynjolfr anyway.
I didn't get a decent photo yet, but I made fingerloop braided ties at the waist band, and can add additional sets if he wants the pants more snug. Overall, I'm proud of how they came out. This was a fun easy project, and I'm looking forward to seeing the finished object on the recipient!
Another plus, is that even for the rather tall Sir Brynjolfr, this project only took two yards of 60 inch wide linen, making it an economical garment too!
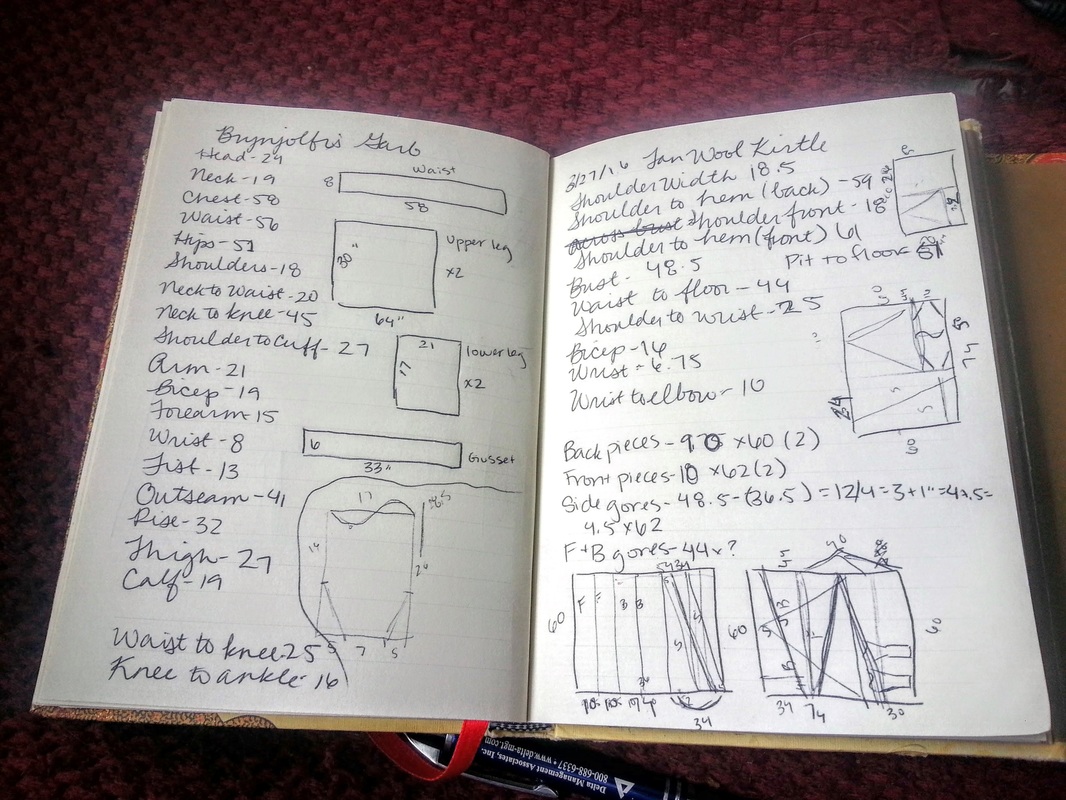
I wanted to share my project notebook here, because it shows the very simple pieces that make up the Rus pants (lefthand page). A couple of rectangles and squares, and that's it.
The other reason I wanted to show it is that it shows the struggles I went through with cutting out my new project, a 14th century kirtle (aka cotte). I had exactly four yards of 60 inch wide wool, and if you haven't learned from reading my blog yet, I love trying out new styles. I had gotten help from a friend with draping a pattern, but when I read the info presented on the Medieval Tailor website I started getting really interested in the look and construction of these ubiquitous garments. You can obviously read a lot more about this on the site itself, but I really liked the author's insights about the fact that kirtles were sort of the transitional item between rectangular construction (think t-tunics, bliauts, etc.) and tailored/draped construction (think tudor/renaissance).
The author bases her pattern on a lot of images, her own experience, and the construction of the Herjolfsnes finds from Greenland, specifically H38, H39, and H41, all of which feature side gores that reach from under the armscye to the hem. The front and back panels resemble the four-panel kirtle we are all used to seeing, but the fitting in the waist takes place along the side gores as well as the front and back seams. This has a couple of benefits in my opinion: 1) No pre-draped pattern required, because who would really have the extra fabric for that in period? 2) Takes advantage of narrow fabric width on period looms. My widest pieces as cut out were 30 inches wide, far closer to period fabric width. 3) Almost no waste. The pieces I had left from cutting out are large enough to be used for something, and the pieces that will be trimmed away in fitting will be negligibly small.
There are only a couple of challenges here. You may be able to see from my first cutting diagram, that I mistakenly only accounted for two side gores (enough for one side), then had to panic and re-configure to get what I needed out out of the fabric I had. I had to plan for slightly narrower front and back gores, but I made it work. The second challenge is that I've never done a sleeve like this before. I eyeballed my sleeve pattern based on the instructions from the site, and I'm sure I'll need to fiddle with it to get it to fit, but I really just want a sleeve that is relatively fitted but in which I can still use my arms.
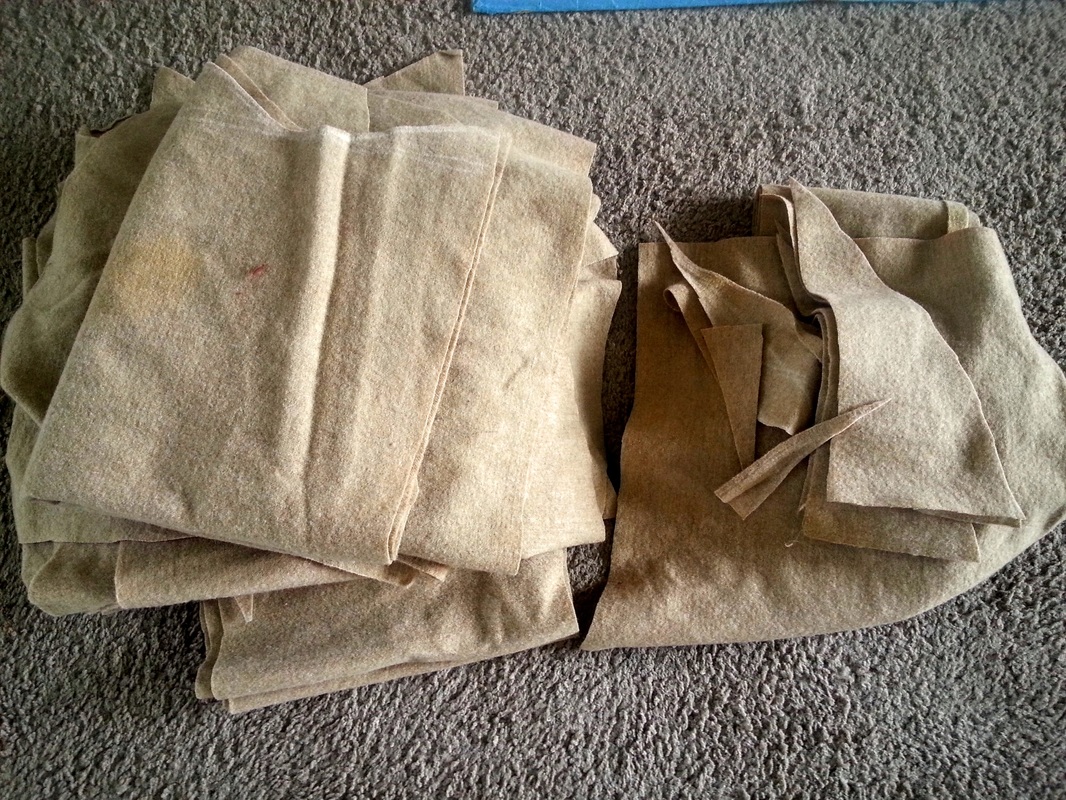
After much scribbling and swearing, I got the pattern cut out, with about a quarter yard left over. This is really a fabric-conservative pattern! The pile on the left is my dress, the one on the right is the scrap fabric, which could become anything at this point... extra sleeve gussets, maybe garters or a pouch, material for future applique projects... You may see a stain on the top left piece of fabric. I have no idea where that came from, as I washed the fabric when I got it, but I'll try washing the dress once more when it's finished. If it just won't go away, I'll dye the whole thing. It's wool, so that should be easy.
The other reason I wanted to show it is that it shows the struggles I went through with cutting out my new project, a 14th century kirtle (aka cotte). I had exactly four yards of 60 inch wide wool, and if you haven't learned from reading my blog yet, I love trying out new styles. I had gotten help from a friend with draping a pattern, but when I read the info presented on the Medieval Tailor website I started getting really interested in the look and construction of these ubiquitous garments. You can obviously read a lot more about this on the site itself, but I really liked the author's insights about the fact that kirtles were sort of the transitional item between rectangular construction (think t-tunics, bliauts, etc.) and tailored/draped construction (think tudor/renaissance).
The author bases her pattern on a lot of images, her own experience, and the construction of the Herjolfsnes finds from Greenland, specifically H38, H39, and H41, all of which feature side gores that reach from under the armscye to the hem. The front and back panels resemble the four-panel kirtle we are all used to seeing, but the fitting in the waist takes place along the side gores as well as the front and back seams. This has a couple of benefits in my opinion: 1) No pre-draped pattern required, because who would really have the extra fabric for that in period? 2) Takes advantage of narrow fabric width on period looms. My widest pieces as cut out were 30 inches wide, far closer to period fabric width. 3) Almost no waste. The pieces I had left from cutting out are large enough to be used for something, and the pieces that will be trimmed away in fitting will be negligibly small.
There are only a couple of challenges here. You may be able to see from my first cutting diagram, that I mistakenly only accounted for two side gores (enough for one side), then had to panic and re-configure to get what I needed out out of the fabric I had. I had to plan for slightly narrower front and back gores, but I made it work. The second challenge is that I've never done a sleeve like this before. I eyeballed my sleeve pattern based on the instructions from the site, and I'm sure I'll need to fiddle with it to get it to fit, but I really just want a sleeve that is relatively fitted but in which I can still use my arms.
After much scribbling and swearing, I got the pattern cut out, with about a quarter yard left over. This is really a fabric-conservative pattern! The pile on the left is my dress, the one on the right is the scrap fabric, which could become anything at this point... extra sleeve gussets, maybe garters or a pouch, material for future applique projects... You may see a stain on the top left piece of fabric. I have no idea where that came from, as I washed the fabric when I got it, but I'll try washing the dress once more when it's finished. If it just won't go away, I'll dye the whole thing. It's wool, so that should be easy.
I think I'm going to go ahead and hand-sew this dress. I know it's a bit crazy, but I really enjoy hand sewing, and it'll be a fun way to get better at my stitches, and to get comfortable with the narrow seam allowances you get in extant finds and can get away with when using wool. I have silk thread to use for the construction, and then maybe this will be an A&S project entry someday. I only set the front gores in wrong twice last night when I got started sewing, even with my trusty assistant Betsy to oversee my work.
 RSS Feed
