Ursula de Strattone
  • Home
  • Links
  • About Ursula
    • Honors Received
    • Service and Offices
  • Contact Me
  • Project and Event Blog

On Cultural Appropriation and the SCA

2/18/2015

0 Comments

 
DISCLAIMER: The following post contains MY PERSONAL OPINION.  I am a practicing Pagan and a member of the SCA, but I'm not any sort of expert.  I have strong opinions on lots of things, but tend to keep them close to the vest, and am far more likely to ask "What do YOU think?" than offer my ideas.  That said, this stuff has been rattling around in my head for a while now.  Proceed with caution.

******************************************************

As someone who frequents Tumblr, I see a fair bit of chatter about cultural appropriation.  Basically, CA is when one culture adopts elements of another culture, but the term now usually refers more specifically to a majority/dominant culture taking and using elements of a minority/oppressed culture as fashion/costume/entertainment and disregarding their deeper meaning.  Picture the whole debate with the Washington Redskins, people dressing as "Indians" or "Geishas" or "Eskimos" for Halloween, especially in a way that can be seen as racist or disrespectful, etc.  

Sometimes it's hard to tell where the line is about what's a respectful appropriation of culture and what's disrespectful/misunderstanding the meaning.  Consider the way the U.S. and its citizens turns St. Patrick's day into a big party all about drinking green beer and wearing leprechaun hats rather than honoring the Catholic roots of the saint or even showing a respectful representation of Irish culture (not to even touch how Irish Protestants might feel about the whole thing), or think about the Mardi Gras traditions in this country, which have way more to do with getting drunk and collecting beads than with the contemplative period of Lent to come.  Are these parties simply Americans evolving their own culture, or is it ignorant and disrespectful?  Can we ever find balance with this stuff?

I think the same issues often come up in the SCA, especially with respect to religion.  Most people in the SCA are intelligent and respectful, and they reenact a particular culture's dress and traditions as a way to learn about history and portray how things would have been in that time and place.  I have even seen people who portray orders of monks or nuns in an SCA context, or wear religious symbols of earlier times, even ones that could be seen as markers of disrespect/isolation at the time, like the conical hats worn by Jews (usually involuntarily) in the middle ages.

The place this touches me personally is with respect to Paganism.  I do not consider myself a Neopagan following a New Age tradition that incorporates the old ways.  I consider myself a follower of the Old Ways.  I am not trying to invent a practice for myself, but rather to worship the way Pagans have worshipped for thousands of years.  This has problems in itself, because records are limited or deliberately destroyed.  I am not realistically able to do things my ancestors would have done simply because I live in a modern world.  I have no need to lead my livestock between to fires at Beltane or sacrifice John Barleycorn in my fields at Lithia.  That said, to the best of my abilities my religious culture is the culture of pre-Christian western Europe.  My ancestors are Danes, Celts, and Britons, and I venerate their stories, their Gods, and their practices.

It is a regular occurrence at SCA events to see people wearing Thor's Hammers, Valknuts, Brigid's Crosses, or even the more neopagan triple moons and pentagrams.  It's impossible to parse out if this is being done in a manner that is respectful, focused on a genuine effort at historical reenactment, or if it is more motivated by someone "cutting loose" and getting to "party like a Heathen" before going to their actual religious observances, and possibly using rather unkind language to refer to Pagans, Heathens, etc. and their "false" idols/symbols.

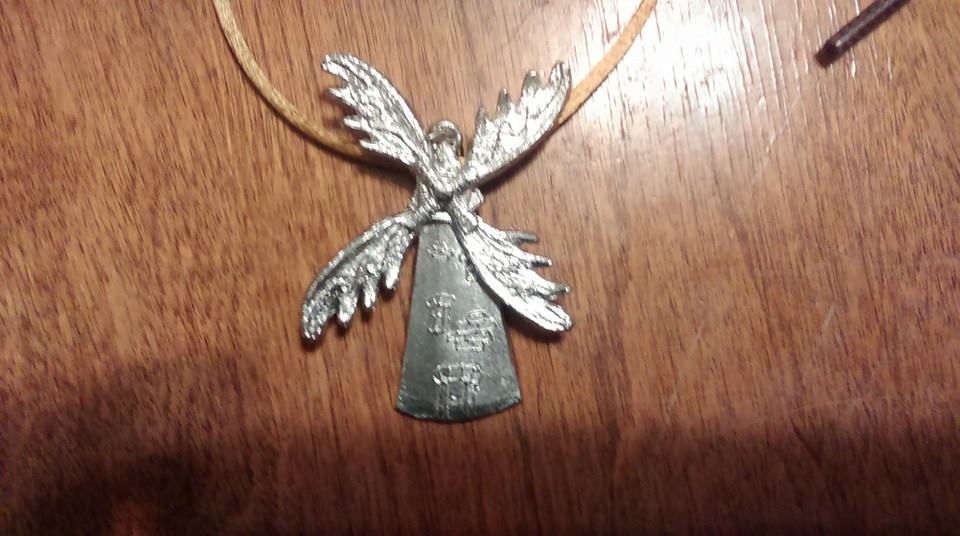
I don't really have any answers to any of these issues.  I would, however, close by asking all of those who play in the SCA to remember to be respectful.  That cool Mjolnir necklace you got at Pennsic or that cool saint's medal you wear may be something of great ceremony and importance to those around you.  Wear it with respect.
0 Comments

Italian Renaissance Ball (Finally!)

2/12/2015

1 Comment

 
Phew!  I am finally taking some time out to post about the ball two and a half weeks ago.  Anything is better than doing homework right now, apparently. 

This ball was the event where I very nearly bit off more than I could chew.  I am co-head of our dance guild, so I brought music/sound system and helped teach dance practice during the afternoon.  I also agreed to co-steward the event since the other steward was rude enough to go and get herself crowned as one of the heirs to our kingdom (darn her!).  And finally, I agreed to run point and organize the ladies in waiting and royal/baronial rooms for the event, and the coffee/tea bar we typically provide.  Somehow I managed it all with lots of help from my very patient husband.  Thankfully there were lots of other ladies to attend on Her Highness and the venue was small enough that we could pretty much keep an eye on her from anywhere since it was one large room.

We arrived around 11 am (in civilian garb) to set up thrones, decorations, etc.  Each of the two rooms for the royals and landed barons/baronesses got a selection of veggies, fruits, hummus and crackers, and water bottles, and accompanying decoration.  The tea/coffee bar was set up and stocked, and I took a bit of time to round up the marvelous group of ladies and figure out who would attend Her Highness during court, etc.   I got into garb and spent most of the afternoon teaching dances to the dozen or so folks who wanted to participate, interspersed with chatting with various people and helping out the heirs.

The event broke for dinner, with off-board seating for some, and my husband and I took the opportunity to go home and get into our fancy clothes for the evening of court and dancing.  He was kind enough to take a picture of me before we left the house, and I snapped a goofy selfie in the car on the way to the event, which shows off my jewelry/accessories a bit more.  Looking back I feel like this still looks rather bare.  I plan to add more embellishment to the sleeves of this dress, and it really needs a girdle too, not to mention a giornea, which really would have been essential for venturing to a ball.

​Photo: Arlen Donald
Picture
Picture
Picture
My husband and I were ambushed at the first court of the evening and inducted into the order of the Windmuhlen Keeper (Windmuhlen being Dutch for windmill).  The Baronial website describes the award thus: "The Windmühlen Keeper is given for outstanding on-going service, to those who consistently demonstrate their willingness to volunteer, and do so tirelessly, graciously, to their utmost capacity, repeatedly, for and on behalf of the Barony of Arn Hold." 

It was a true honor to be given this award, and I felt very moved to be thought of.  I snagged a photo of the awarding from a friend's facebook.  Thanks Cynthia! The beautiful scrolls by our friend and newly-redesigned tokens (the windmill arms are moose antlers that really turn, as our local device has a moose on it) made this even more special.  It's funny, all the awards my husband and I have received so far we have received together.  I don't think anybody is really surprised at this, as he and I really are pretty inseparable.  
Photo: Cynthia Crowell
Picture
Picture
Above photos: Arlen Donald

We had an insane amount of dancing at the event.  I wore my red leather dance slippers that I got for Scottish Country Dancing, as they seemed to fit my Italian garb very well.  Here's a photo from a dance class.  I didn't wear the black socks or ankle brace to the ball, but didn't think to get a photo, since I was too busy dancing, running around, flirting, drinking wine, standing in court, and generally living the dream.
Picture
Picture
Above Photo: Patience Hallda

All in all, the evening felt like a fairy tale.  Though I was exhausted and rather hungry, having mostly forgotten lunch and dinner, I had a magical time.  The evening also included a dessert competition, and there were so many delicious entries that I didn't waste away too miserably.  The excellent Lady Tabitha from Hare de Luna was in attendance, and she styled many of the ladies' hair in period styles for the event.  Though the above photo is before her ministrations, I was able to borrow this photo from her page showing my lovely Italian hair taped bun and the period images that inspired it.  It was very comfortable and didn't budge even through the most rowdy of country dances.  Tabitha does marvelous work, and her huge book of style ideas with period documentation is fantastic.  Get this girl a Laurel.

Below image by Tabitha Mounteer
Picture
1 Comment

1540s Florentine Gown

2/3/2015

2 Comments

 
Picture
Well.  I must say, this dress felt like an impossible task for a simple early period girl like me, but with much encouragement from my friends in the Arn Hold Clothiers' Guild and throughout the kingdom, I girded my loins and decided to try it.  Between grad school and working full time, this was the only project I planned to tackle in the second half of 2014, and I didn't really start on it until after Thanksgiving.

The first step was buying the fabric.  My husband and I planned matching garb, and since we are not as rich as the Florentine hoi polloi, we settled on this synthetic brocade which was on clearance at Home Fabrics for $5 a yard.  It's actually pretty good for a synthetic in terms of period-looking pattern, etc.  We purchased ten yards for the two of us, and I think my dress probably ended up taking about six.

The first step was to make a bodice mockup based on my measurements.  I relied heavily on this website as far as taking the measurements went, and which ones to take.  Then I used wrapping paper to make a pattern, and since my figure is kind of complicated (big difference between bust and waist) and because this is my first time with anything like this, I cut out several mockups from an old sheet, pinning/sewing, cutting, resewing, etc. until I got the shape I wanted.  Unlike the drawing on the website above, I had to angle the straps in the front and back to get them to go across the point of the shoulders, so seen from above they actually make a V shape, with the points pointing away from my neck.

Because I have a bit of a tummy and a short torso I thought the slightly longer bodice with the curve at the bottom in the above image of Eleanora de Toledo by Bronzino would be more flattering on me than the slightly earlier pictures with waistlines at the natural waist.  I didn't want to make an exact replica, but the shape of the bodice and the use of a big pattern motif appealed to me. 
After five mockups I had a shape I liked.  I cut it at an angle from the back of the underarm down to a few inches out from my spine to do side back lacing.  Next I traced my finished pattern onto some cotton canvas and some spare polka dot cotton fabric with half inch seam allowances (For future, 1/4 inch allowances would be enough, and would have saved me some steps. ) and some extra length in the straps.  On the advice of the ladies who taught our class, I took in each side of the front and back piece by an inch in the center, drawing a curve from that point to where the top and bottom started, so that when laced, the bodice would draw in under my bust and provide some support while helping avoid extra bagginess under the bust, since there are no darts and I am quite hourglass-shaped.  

I know the debate about whether the Italians wore corsets rages on.  My thought is that the dresses were more likely to have had internal stiffening, and if you look at Eleanora's torso, there's not a wrinkle in sight.  I decided to bone my bodice with heavy duty zip ties (the ones I got were 48" long and about 3/8" wide).  Based on the class I took, the size and flexibility of these zip ties is pretty similar to whalebone, and holds up well to repeat wearings.

I think next time instead of two layers of material I'd use grosgrain ribbon sewn down to make channels.  This woul dmean one less layer to sew and make the dress hot.  Here is how I drew out and sewed the boning channels for the front/side piece.  The lines are 1/2" apart, to give the boning room to go in.  I cut the boning to size (1" shorter than the channels, since they include seam allowance) with pruning shears, and tried to snip off any sharp points (though next time I would take the time to cut them into curves).  Below is a photo of the boning plan.
Picture
Picture
Here is the front piece and back piece with the boning complete.  After sliding the boning into the channels I ironed the whole thing to take the curve out of the zip ties, which worked great.  Here you can see the exterior fabric in the upper left corner, and also the fun polka dots.  You can see the back piece only has four bones, two down the center and one at each side at an angle.  The small amount of space at the bottom proved to be tricky when it came time for eyelets.  My next dress will likely be side laced just so I can get in and out of it on my own.
Picture
To these layers I added gold linen lining on the inside, and thin cotton quilt batting (to stop the boning showing through) topped with the brocade on the outside, having cut out the bodice so that the main pattern motif (which was directional and symmetrical) was centered in front and back.    Below is a photo of my innovative use of pattern weights to hold everything in place when I cut the brocade. ;)  Then a photo of everything put together.  I left the bottom edge of the front and the top edge of the back open to turn them right sides out.
Picture
Picture
I shared that photo on facebook and so many people thought the back piece was a big pair of knickers that I've decided I will eventually make myself some out of the leftover fabric.  Teehee.  

Anyway, the next step was to sew eyelets along the edges of the front and back.  I didn't bother about having a bone in between the eyelets and the edge of the bodice, since the bodice isn't meant to reduce me at all, and five layers of material in the seam should be pretty strong.  I used cotton embroidery floss for my eyelets, and did them every two inches along each side, except at the top on the back piece, where there is only a one inch gap between the first two (so I can spiral lace).  Every inch would have been more period, but that's a LOT of eyelets.

Once I had the holes in I was able to try on the bodice and figure out where to set the straps.  My hubby helped with this step, which was to cause trouble later.  I said I NEED A DRESS DUMMY so many times in this process that I'm planning to make a duct tape one soon.  

I attached the straps by hand and hand-finished the top of the back and bottom of the front piece by turning the raw edges of the lining and brocade in and whip stitching them.  I had to trim down the lining layers to make this work, and I should have cut them smaller to begin with.I also should have cut the lining fabric slightly smaller so that the brocade wrapped around the edge to make sure the lining didn't show.  If I do this project again, I'll do the clipped self bias tape edging and sew that in around the top and bottom of the bodice, but I decided to forego it for my first effort.

The next step was the skirt.  After studying Eleanora's portrait it looked to me like there was a small section in the center front where there was no pleating, to showcase her lovely fabric.  Since the rest of the skirt isn't readily visible in the portrait, I decided on a six inch section at the center front that would be smooth, then knife pleating all the way around the sides, and a double box pleat at the back (the width of the bottom of the back bodice piece) to give a little fullness there and make the skirt trail behind me nicely.  I measured from natural waist to floor and added a few inches for seam allowances, then cut panels from my fabric from selvedge to selvedge (yay no seam finishing!) until I had roughly three times the measurement of my waist.  This turned out to be just about right for a nice full skirt, but for box pleats or more knife pleats I certainly could have added more in, or put in a couple gores.  This page has great info on period pleats.  I sewed up the sides to make a big tube, then folded the edge down and stitched that.

I started with the center back and pinned the box pleat first, the width of the lower back piece (I think it was about four inches.  Then I found the center front and marked the section to stay flat.  I figured out the remaining amount of waist band inches and the remaining amount of fabric inches and then basically eyeballed pleats to take up that fabric, which wound up being knife pleats about one inch wide.  I made these going away from the center front.  Once I had all the pleats pinned I did a line of machine stitching over them and pressed.

Here's a photo of the front of the skirt, showing the flat panel and the knife pleats,  Below that is one of the back with the double box pleat on the left side, held open to show the two folds.
Picture
Picture
Next, I marked along the inside of the bodice where my natural waist was, and pinned the skirt along there.  I knew this was going to be a bit fiddly because of my low curved front.  If I had a straight waist-length bodice I could have just attached the skirt with my sewing machine, right sides together.  

So, I pinned the skirt in along the natural waist line.  Then, I pinned the skirt close to the lower edge of the bodice, and, girding my loins, cut a shallow U-shaped piece (will add a photo of this when I can) away from the front of the skirt between the natural waist and the bottom of the bodice (leaving about an inch of overlap).  I didn't want all the extra bulk around my waist of leaving the front of the skirt in there. Then I hand stitched the skirt to the bodice, using the finished edge of the skirt where possible, then turning down the raw edge and stitching that when I got to the section that was cut.  I also cut a six inch slit on either side of the box pleat and hemmed each side, so I can get in and out of the dress, and reach for a pocket (aka a saccocia) when I have one.  I would like to add a hook and eye to each of the slits, but haven't done so yet. (Will add pics of inside of the bodice where skirt is sewn and of the slits soon).

At this point, the hardest part was over.  I put the finished dress on and admired my handiwork, only to realize that the back was too wide and gaped out at the top, and the straps I had made extra long just in case were actually too long.  Sigh.  I had a fit at this point, threw the dress in a corner, and went to bed, but the next morning I once again girded my loins, ripped open the top of the back, removed the straps, and cut off about an inch from each top corner down to the underarm   This was a bit nerve-wracking for me, but I did it.  Then I trimmed the straps down, sewed them back in, and finished the edges of my back piece where they were open.  It was so gratifying that the problem was fixed since it was quite scary to cut a basically finished dress open.  I should have cut the underarms slightly lower to give my arms more movement.  This has been the biggest challenge to wearing this dress.

Here's an image to show approximately where I cut on my finished bodice back. 
Picture
At this point my husband put the dress on (which was hilarious), but I don't think I should share that photo with you.

All that was left was sleeves, hemming the skirt, and embellishment.  I had my hubby help me pin up the edge of the skirt to the right length to just brush the floor, since this dress was for dancing.  I cut the skirt about four inches too long, which made it very easy to cut a two inch strip of felt and slip it into the hem, then wrap the fabric up around it, then down into the crease to make a nice wee sandwich.  This finished the edge and all that is visible inside and out is the brocade.  This technique was used in period to give the skirt some fullness at the bottom and keep it from pulling between the legs,, and it's very easy on this type of skirt because the bottom edge isn't curved, so no need to curve the strips of felt either.  I sewed this down with a machine, and moved on to the sleeves.

Using this guide for reference I measured the length from the point of my shoulder to wrist, and from underarm to wrist, and my arm circumference at these points.  I added in two inches for ease and seam allowance, and wound up with this shape (folded in half), which I cut out with help from my cats.  I hemmed the wrist and the upper, and sewed the underarm closed.  I opted for simpler sleeves than Eleanora's gown, especially because of my limited skill with this.  I simply cut a slit from about four inches from the top of the shoulder to about four inches above the wrist, sewed a rolled hem around this, and added some black grosgrain ribbon bows to hold it closed.  I also sewed black grosgrain ribbon ties to the shoulder straps and tops of the arms to attach the sleeves. I'll add a few more photos in for that stuff too, when I get a chance.
Picture
Finally, I hand stitched on some trim a friend brought back from Pennsic for me.  It is a strip of black velvet ribbon
2 Comments

    Ursula

    I like to: play with fleece, spin, knit, weave, sew, garden, cook, eat, bake bread, dance, read, sing, and learn new things.

    Above image is from the Beinecke Ms. 229 Arthurian Romances c. 1275-1300 France.

    All photos by me unless otherwise credited.

    Like what you see?  Buy me a coffee on ko-fi!

    Archives

    May 2019
    March 2019
    February 2019
    January 2019
    November 2018
    October 2018
    July 2018
    June 2018
    May 2018
    April 2018
    March 2018
    December 2017
    July 2017
    June 2017
    May 2017
    April 2017
    March 2017
    February 2017
    January 2017
    December 2016
    November 2016
    September 2016
    August 2016
    July 2016
    June 2016
    May 2016
    April 2016
    March 2016
    February 2016
    January 2016
    November 2015
    October 2015
    August 2015
    July 2015
    June 2015
    April 2015
    March 2015
    February 2015
    January 2015
    December 2014
    November 2014
    October 2014
    September 2014
    August 2014
    July 2014
    June 2014
    May 2014
    March 2014
    February 2014
    October 2013
    July 2013
    June 2013

    Categories

    All
    16th Century
    Archery
    Avacal
    Awards
    Baby
    Beads
    Bears
    Bliaut
    Breastfeeding
    Brewing
    Calligraphy
    Classes Taught
    Dancing
    Darning
    Device
    Dogs
    Download
    Embroidery
    Events
    Food
    Garb
    Gardening
    Garlic
    Hair
    Handouts
    Handsewing
    Heraldry
    Hometown Pride
    Italian
    Kirtle
    Knitting
    Mending
    Needle Lace
    Norse
    Photos
    Planning
    Rapier
    Retinue
    Roman
    Scrolls
    Slug
    Spinning
    Sword And Horse
    Thrown Weapons
    Weaving

    RSS Feed

Powered by Create your own unique website with customizable templates.