Ursula de Strattone
  • Home
  • Links
  • About Ursula
    • Honors Received
    • Service and Offices
  • Contact Me
  • Project and Event Blog

Raptor War, July 8-10, 2016

8/11/2016

1 Comment

 
Well!  I have so much to update about.  I am slowly chipping away at my little list of topics still to cover from my recent activities, and now that I have a bit of respite in between summer and fall classes I can get down to business.

Raptor War is our Barony's premier event, and this year I was looking forward to enjoying it after co-stewarding it with my husband last year.  It's also sort of a big event for our household, since it's really where we all came together and formed what would become the Cavalry of the Sword and Horse.  It was going to be one of the only events everyone could make it to this year, so we really wanted to make it good.

The site was the beautiful Niagra Springs State Park, as it was last year, and we had the place to ourselves, so everyone spread their tents out willy-nilly.  It was great for getting the steps racked up on my pedometer, but it led to ltired feet too  The Cavalry set up their encampment around the fire pit, and wound up being party central for the event, which is fine with us, and makes it easier to stumble back to the tent when it's time to sleep.

On Friday afternoon we set up camp in our usual arrangements.  Period tents in a circle around the fire pit, with mundane tents behind them and out of sight.  After all the tents were up, we started preparing for the Pelican vigil of our own Don (now Master) Gomez.  The household teamed up to make refreshments, and I was happy to see that his vigil shirt (post on that to come) seemed to fit him well.  Once all was ready, the King came over to kick off the vigil, with the other landed Barons and Baronesses visiting next, then the rest of the rabble as they arrived.  I stood guard for a shift, and we all tried to share guard duties so nobody was stuck too long.  

I wish I could say people were patient and prompt, but as always there were people who didn't comport themselves as they should.  It gets hard to be genteel when those who supposedly outrank one can't do the same.  I am still trying to figure out the best way to stand up for myself while being courteous and respectful of rank, and I'm still frustrated at the attitude of acting like all is well while gossip and rudeness go on behind closed doors or in private conversations.  It can be hard not to let this stuff get you down.  Egos just suck when they get out of control.

In any case, the vigil went well, the refreshments were lovely, and we all got to bed at a reasonable hour.  On Saturday morning our household held a pancake breakfast for anyone who wanted one, and it was pretty popular, despite some setbacks with the grill.  I competed in our Barony's archery championship, and didn't do too badly, though I was no match for our new champion, Pieter.

After the archery, we proudly watched as our newest Quarter Horse (Cavalry member) became a squire.  Congratulations to Titus and Sir Etienne.  They're a great pair, and he's a heck of a fighter.

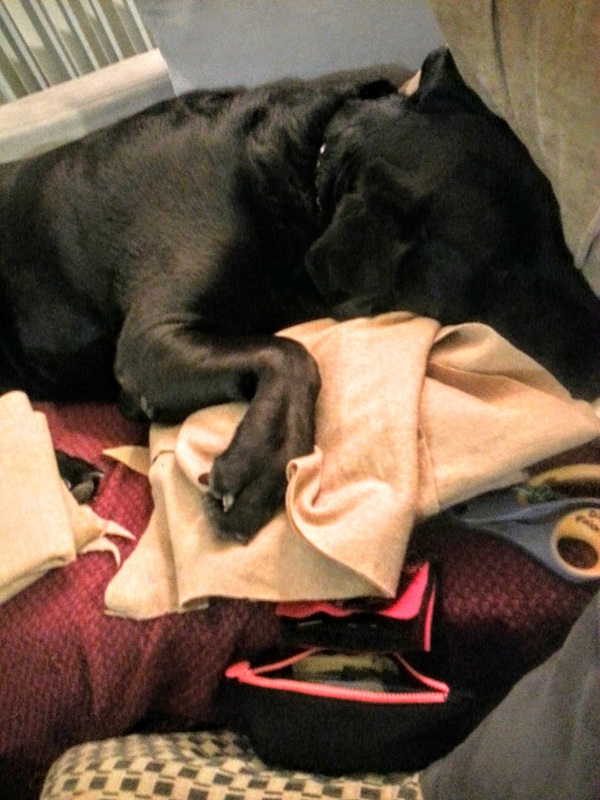
My sister Thora came up for the day and brought the dogs with her, which was fun.  We don't usually bring them to events, but it was great to have them, especially since I didn't have much to do or much company, as my husband was off marshalling for the heavy fighters.  I spent most of the afternoon enjoying the shade and visiting with friends, with a little break to run the children's scavenger hunt, and another to take a dip in the springs, which pour right out of the cliffs above the camp ground.  

After our swim we were nice and clean, and somehow all of us ladies got persuaded to take part in the recently un-banned game of Helga Ball, a variation on rugby popular in the SCA among people who like to get injured.  It must be played in a dress, with a cabbage for the ball, which can only be caught and carried in a skirt.  I was gratified to hear one of the female heavy fighters say that it was far harder, and rougher, than heavy fighting.  I got my hand stepped on, and just got my rings off before my fingers started to swell.  Nothing was broken, but it was bruised and sore for a week, and it is still tender now, nearly a month on.    After the Helga Ball another group played shinty (a Celtic relative of field hockey), which was just as injury-filled and entertaining.

Saturday night we had a fundraiser dinner followed by court.  I was helping out in court for this one, so I spent some time before hand looking over the agenda, prepping tokens and scrolls, etc. with the herald, Master Braden, and my fellow Lady in Waiting, HL Malatesta.  Funnily, I saw my name on the court agenda, but kind of glossed over it.  I thought it was there because I was one of the ones helping out.  Of course, that wasn't it, and I was given a society-level award, something I really wasn't expecting.  

The award is called the William Blackfox Award, and it's given by the Society Chronicler to chroniclers and Baronies for their newsletters.  The Barony of Arn Hold and I were given the award for Best Layout and Design for AS 49.  It was really nice to be recognized for my work.  I've been doing our newsletter for two years now, and sometimes it feels like nobody reads it.  All my fellow hoodlums from the Cavalry, including my husband and my sister, were sitting on the grass at the back, so there aren't any photos, and I doubt anybody could hear our rather soft-spoken King, but it meant a lot to me.

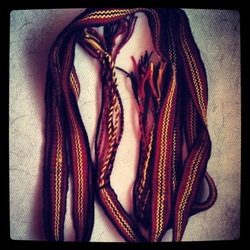
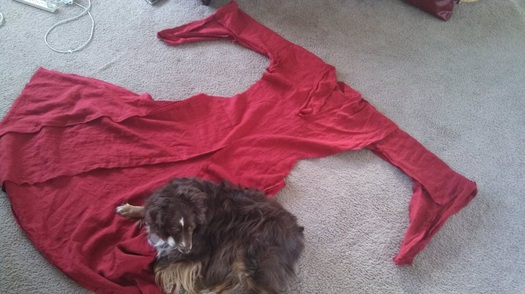
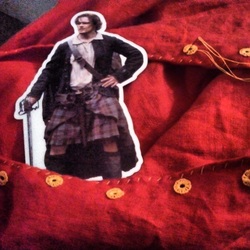
Master Gomez's vigil was really beautiful, and his garb turned out so well.  I got a couple compliments on the doublet, which are so nice to hear.  Despite my holding up a lantern through the ceremony (and getting the requisite bug bites as a result), it was too dark for any good pictures of the garb, so those will have to come later when we can corral Gomez.

After court the Cavalry held a giant party, culminating in our second annual men's belly dance competition.  It was truly entertaining to watch, and our own Duke Ronan will be champion for the coming year.  My husband was very happy to relinquish the title.  The  beverages and revelry continued, with a decent bardic and a lot of good stories.

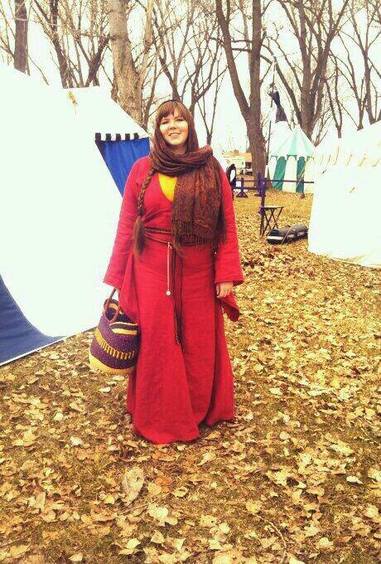
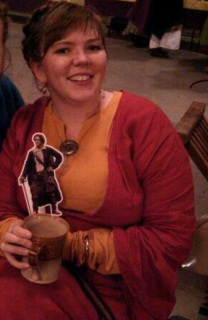
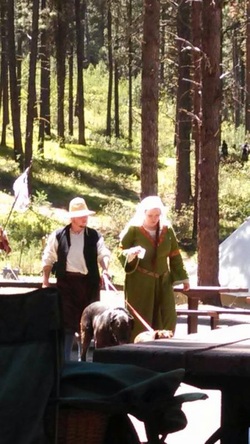
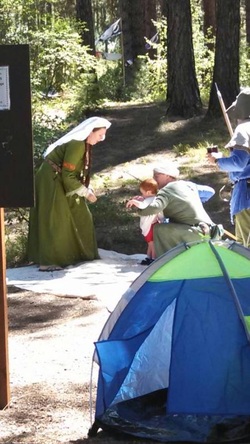
Sunday morning came far too early, and we were packed and on the road by 11.  There are a few photos below courtesy of Her Excellency Kara of Wealdsmere, mka Rachel Kleinpaste.  
1 Comment

A FO for March and a new project!

3/28/2016

1 Comment

 
Well, I can proudly say that Sir Brynjolfr's trousers are finished well before the Memorial Day deadline we agreed on.  I am probably going to see him at Honor War in a few weeks, so I can bring them for him to try on in case of any modifications.  For now, though, here's the finished trousers.  I used my serger on these since hand-sewing wouldn't even be visible, and I wanted them to be machine-washable and sturdy.
Picture
They are based on the style known in the SCA as Rus trousers, which actually seems to have been pretty common throughout the Viking world.  There are lots of images of men wearing full trousers that appear creased or pleated, which come in below the knee for a tight fit.  

I have to say a huge thank you to my husband, Lord Aonghus, who helped me struggle through these.  He gave me all the source info I could possibly ask for, and helped keep me on track (check out his references on his Norse Garb pinterest board).  It was at his suggestion that I make the lower leg portion full-length instead of just a shorter strap/cuff below the knee.  He said these pants were sometimes worn without leg-wraps, and that they are more comfortable and stable with leg wraps if the trousers go all the way down.

The waist band is made of a double-folded strip of linen, eight inches wide.  Aonghus says he makes his trousers so that each leg is twice as wide ashis thigh measurement.  I went with the full width of the linen, since I had enough, it was close to that measurement,  and it was easy to measure/cut.  The thigh pieces are attached by a crotch gusset that runs from the front waistband to the back, and is a couple inches longer than the client's rise.  The bottom leg sections are about two inches larger than his calf, and should reach to the ankle.

Below is a photo of the full width of the trousers.  It kind of makes me think of those before/after weight loss photos with someone holding their giant old pants.
Picture
The waist band was made about two inches longer than Sir Brynjolfr's waist.  I then pleated the pants into the waistband by marking halves, quarters, etc. until I had about one inch pleats.  I did the same thing with the trouser legs where the lower leg connects.  A lot of the construction of these pants was based on conjecture, since actual period examples are really scarce.  Many reenactors have made similar pants without adding a waist band by simply folding over the top of the pants and adding a drawstring.  My experience of wearing garments like that is that they're uncomfortable.  The gathered material shifts around, feels baggy, makes clothes look rumpled on top, and can be kind of a pain to get in and out of.  I made a waist band for comfort and ease of wearing, but I think it's a plausible addition to a pair of pants, and likely will never be seen by anyone except Sir Brynjolfr anyway.

I didn't get a decent photo yet, but I made fingerloop braided ties at the waist band, and can add additional sets if he wants the pants more snug.  Overall, I'm proud of how they came out.  This was a fun easy project, and I'm looking forward to seeing the finished object on the recipient!  

Another plus, is that even for the rather tall Sir Brynjolfr, this project only took two yards of 60 inch wide linen, making it an economical garment too!
Picture
I wanted to share my project notebook here, because it shows the very simple pieces that make up the Rus pants (lefthand page).  A couple of rectangles and squares, and that's it.

The other reason I wanted to show it is that it shows the struggles I went through with cutting out my new project, a 14th century kirtle (aka cotte).  I had exactly four yards of 60 inch wide wool, and if you haven't learned from reading my blog yet, I love trying out new styles.  I had gotten help from a friend with draping a pattern, but when I read the info presented on the Medieval Tailor website I started getting really interested in the look and construction of these ubiquitous garments.  You can obviously read a lot more about this on the site itself, but I really liked the author's insights about the fact that kirtles were sort of the transitional item between rectangular construction (think t-tunics, bliauts, etc.) and tailored/draped construction (think tudor/renaissance).  

The author bases her pattern on a lot of images, her own experience, and the construction of the Herjolfsnes finds from Greenland, specifically H38, H39, and H41, all of which feature side gores that reach from under the armscye to the hem.  The front and back panels resemble the four-panel kirtle we are all used to seeing, but the fitting in the waist takes place along the side gores as well as the front and back seams.  This has a couple of benefits in my opinion: 1) No pre-draped pattern required, because who would really have the extra fabric for that in period? 2) Takes advantage of narrow fabric width on period looms.  My widest pieces as cut out were 30 inches wide, far closer to period fabric width. 3) Almost no waste.  The pieces I had left from cutting out are large enough to be used for something, and the pieces that will be trimmed away in fitting will be negligibly small.

There are only a couple of challenges here.  You may be able to see from my first cutting diagram, that I mistakenly only accounted for two side gores (enough for one side), then had to panic and re-configure to get what I needed out out of the fabric I had.  I had to plan for slightly narrower front and back gores, but I made it work.  The second challenge is that I've never done a sleeve like this before.  I eyeballed my sleeve pattern based on the instructions from the site, and I'm sure I'll need to fiddle with it to get it to fit, but I really just want a sleeve that is relatively fitted but in which I can still use my arms.

After much scribbling and swearing, I got the pattern cut out, with about a quarter yard left over.  This is really a fabric-conservative pattern!  The pile on the left is my dress, the one on the right is the scrap fabric, which could become anything at this point... extra sleeve gussets, maybe garters or a pouch, material for future applique projects...  You may see a stain on the top left piece of fabric.  I have no idea where that came from, as I washed the fabric when I got it, but I'll try washing the dress once more when it's finished.  If it just won't go away, I'll dye the whole thing.  It's wool, so that should be easy.
Picture
I think I'm going to go ahead and hand-sew this dress.  I know it's a bit crazy, but I really enjoy hand sewing, and it'll be a fun way to get better at my stitches, and to get comfortable with the narrow seam allowances you get in extant finds and can get away with when using wool.  I have silk thread to use for the construction, and then maybe this will be an A&S project entry someday.  I only set the front gores in wrong twice last night when I got started sewing, even with my trusty assistant Betsy to oversee my work.  
Picture
1 Comment

Coronation Garb

3/26/2014

0 Comments

 
The new king and queen of Artemesia are local to our Barony (Arn Hold) and are new friends of ours.  The coronation festivities were to be held locally, so of course my husband and I decided to attend.  Many of us were creating new garb for the occasion, and though I'm usually not able to attend clothier's guild I decided I needed something nicer, fancier, and more accurate to wear as I build my medieval wardrobe.   My kingdom's colors are black and gold, and the new monarchs' colors are black and red, so I decided to go with gold and red as a little nod to both. 

Picture
My miniature Australian Shepherd, Cody, really loves to help me sew.  Most seamstresses have to make do with pins to hold their fabric down, but I am lucky enough to have a dedicated assistant to help!  Here he is holding down the start of my new underdress.  I used the same worksheets to guide me as for my first garb, this time with some lovely mediumweight linen (the color is Harvest Gold) from www.fabrics-store.com.  Though I bought 5 yards of fabric, this used only 4.  I could have skipped the full skirt, but the underdresses are really learning pieces for me, and I am still working to familiarize myself garment construction in a historical context.   I may eventually make some quickie underdresses with slits on the sides instead of full skirts, and I also have plans for some fake underdresses for hot weather (just sleeve ends and a sort of dickie at the collar... Idaho is too hot for multiple layers in the height of summer, even just layers of linen).

Picture
Here is an image of me in the finished underdress (note that I haven’t evened up or sewn the hem yet, so it looks a little off).  I think the fit of this is a lot better than my first one because I had an epiphany about curves.  I have a very hourglass figure (more than 10 inches difference between waist and hips) with a short torso and long legs.  Remember how in my first garb the gores start basically right below my bust?  That's because I didn't take into account the fact that my shoulders and bust would impact where the gore fell on my body.  

It doesn't matter too much for an underdress, but I wanted this set of garb to be more true to the 12th-century silhouette with garments close-fitting through the whole torso and flaring only at the hips.  I decided to figure the length of the gores by measuring from the fullest part of my hips to the floor instead of waist to the floor as directed in the handout here.  That meant that with the reduction in length created by my bust and shoulders the gores actually sat right about at my natural waist, about 6 inches higher than the fullest part of my hips.  I don't have a huge amount of experience with draping/drafting my own patterns, so I am learning a lot through this process.  

I made the sleeves extra-long and scrunched at the wrist again, and because I am lazy (classy?) like that, I set up the sleeves so that each hem would be a selvedge edge so I didn't need to hem them.  I actually really like the look.

Picture
I ripped and sewed most of these seams several times, until I was only left with this much thread (after starting with a full spool).   I decided that all the non-visible sewing would be done on the machine to save time.  I went back later and stitched around the neck facing with red linen thread for a bit of embellishment (more later when time allows) and I hand-sewed the bottom hem as well (partly because I hate sewing hems on my machine).  I also plan to flat-fell the seams, but I ran out of time to do that before Coronation.

Picture
I used my rigid heddle loom to weave a five yard long belt to wear with my garb, long enough to wrap twice around the waist/hips and hang down decoratively to about my knees.  I used leftover bits of gold, red, and black wool sock yarn from previous knitting projects, which worked well.  This was my first warp-faced weaving project and it took some time to learn to pull the weft tight and beat it down securely with the shuttle.  Those are both big no-nos in plain weaving, which is all I've done before.  It was a fun learning experience, though, and I see lots more warp-faced weaving in my future.  For my next project I hope to learn about pick-ups!

Picture
Here's Cody again, posing with my bliaut just after I finished all of the construction.  I used most of five yards of 60" wide linen from fabrics-store.com which allowed me to be generous with the skirt.  I followed the basic instructions on this page but learned a few things along the way worthy of note.   

1)       Due to my extreme curves, 10" (5 extra inches on front and 5 extra on back) was not enough to make waist scrunches.  In fact, it was just about what I needed to ensure the dress was floor-length and no more.  I ended up really liking the way it looked, but I will need to fiddle with things some more to make the waist scrunching work.

2) For the sleeve drape I made rectangles 10" by 20" so I wound up with triangles that were 5" on the short (sewed to the sleeve hem) side and 20" on the long side.  Honestly, I will probably make even drapier sleeves next time, but I likely will go for more of an oblong/rectangle shape instead of a triangle.

3) I made the skirt gores as wide as they were tall.  This led to a deliciously full skirt with about 20 feet of bottom hem.  This is more fullness than I've done before, but I loved the look, and I will do it again.

4) I used 1 inch seam allowances on all pieces.  That was probably overkill for the sleeve seams.  I plan to line the sleeves eventually, so it's not an issue, but still.  I wanted the 1" allowances so I'd have plenty of room for flat-felling the seams (see top image on this page for info on how).  In fact, what I would probably do on the sleeve cuff pieces next time is make them twice as wide, fold them in half, and stitch them on that way.  One less seam to finish and it would give the sleeves a bit of weight and drape.

4) I decided to be brave, follow the pattern (despite my misgivings) and try a slit neck.  I will say that I don't like the suggestion to hem the neck slit rather than use a facing (especially with linen, which has a tendency to rip and fray rather badly), and that I tried the slit neck on and it looked really odd and messed up the fit of the sleeves.  At that point I had a bit of a freak out because I had just cut a major slit in my dress and I didn't like the results.  I laid it flat and cut out a v-shaped neckline that worked for me, though I feel it's a bit longer than I would have liked.  I then used a spare scrap of fabric to sew on an after-the-fact facing, which looked and felt much better, IMHO.

5) Instead of trying on the dress to determine lacing placement I laid it out on the floor.  I had previously figured out bust, waist, and hip circumferences as directed in the pattern.  At the point where the gores started the dress was already at hip width.  Below the underarm gussets I marked the fabric so it was half of my bust measurement (centering on the torso).  Halfway between that and the start of the gores I marked the fabric to be half my waist measurement.   I didn't use seam allowances because I knew I wanted some negative ease in the torso.  I then drew straight lines from bust to waist, and waist to hip, then cut out the sides of the fabric.

Picture
6)I hand-stitched the neck facing, cuff hems, and side hole hems with yellow linen thread.  Then I hand-sewed eyelets every two inches from underarm to hip on the sides.  That was a LOT of sewing, and next time I will know I need at least two spools of thread.  I ran out and had to use a bit of sewing machine thread (four strands held together) to finish up.  Here is a photo of PocketJamie (from the upcoming Starz TV rendition of Outlander) with the endless eyelets.  I finished them at about 1 am on the morning of coronation, so no other seams got finished.  I machine-hemmed the bottom of the skirt in the morning before the event.  I plan to go back later and redo it by hand so it looks halfway decent.

7) Despite planning for negative ease through the torso (no seam allowances, approx. 3/4 inches on each side of each piece for hem, eyelets set in another half inch or so) the torso was too lose.  I think I lost some weight between starting and finishing the construction.  At some point I will go back and re-hem one side of each piece and (sigh) sew new eyelets so that I can get the torso fit more snug.

8) I plan to line the sleeves with some of the extra yellow linen from my underdress.  I think it will add a real bit of extra drape to the fabric, and it will certainly be prettier than looking at the seams inside.  I will most likely lay a sleeve on a piece of paper and trace the shape from the flare down and use that to draft a pattern for lining pieces, then tack them in by hand with hemstitching.

Picture
I need to take a few more photos of the final outfit, but here is a photo from the morning of the event (before the rain started).  The basket was a gift from a friend, it was made by a local refugee artisan weaver.  It’s one of those things that looks period enough not to disrupt the feel of the event.  The headrail is a pashmina I've had for years with a paisley jacquard pattern.  I'm not sure of the material, but I think it's a wool blend.  It matched my colors nicely, kept me warm, and kept me from being so indecent as to go around with a bare head (see next pic for more evidence that I can't seem to leave anything on my head alone for long.  This is true in my mundane life as well).  The pattern isn’t precisely period, but it did the job.

I received lots of compliments and the dress was comfortable, but I still need to finish all the seams of both dresses, re-hem the red one, and line the sleeves.  I also want to add some more embellishment to spice things up a little... not sure what that will be yet.  Beads, embroidery, applique... we'll see!

Picture
Here's another shot of me (again with PocketJamie) where you can see just how deep the neckline is, and the pewter pin (a souvenir from my aunt's trip to Norway) I used to hold the underdress neckline closed.  This also shows the extra-long scrunched sleeves on the underdress too.  

0 Comments

Raptor War Recap

7/30/2013

0 Comments

 
Picture
Well, my husband and I had a lovely time at Raptor war in the tree-shaded mountains north of Boise.  I participated in the archery competition, and he enjoyed the thrown weapons.  There was also a great burger feast, a bardic, and a reverse laurel tourney where the laurels of our area got to show off their handiwork.  I was so busy having fun that I didn't take any photos at all, but a friend got this shot of my husband and I with our dogs.  Not great, but there it is.

Photo: LaJohnna Honey

Picture
Here's a pic of me helping out with our kid-friendly version of Spear the Beer.  We did Spear the Water Balloon instead and it was a big hit.  I got a big bucket of water dumped on me at one point and it felt wonderful.  Even with the shade and trees it was hot!  Notice my veil being blown back by the breeze.  It felt divine.

​Photo: LaJohnna Honey

0 Comments

    Ursula

    I like to: play with fleece, spin, knit, weave, sew, garden, cook, eat, bake bread, dance, read, sing, and learn new things.

    Above image is from the Beinecke Ms. 229 Arthurian Romances c. 1275-1300 France.

    All photos by me unless otherwise credited.

    Like what you see?  Buy me a coffee on ko-fi!

    Archives

    May 2019
    March 2019
    February 2019
    January 2019
    November 2018
    October 2018
    July 2018
    June 2018
    May 2018
    April 2018
    March 2018
    December 2017
    July 2017
    June 2017
    May 2017
    April 2017
    March 2017
    February 2017
    January 2017
    December 2016
    November 2016
    September 2016
    August 2016
    July 2016
    June 2016
    May 2016
    April 2016
    March 2016
    February 2016
    January 2016
    November 2015
    October 2015
    August 2015
    July 2015
    June 2015
    April 2015
    March 2015
    February 2015
    January 2015
    December 2014
    November 2014
    October 2014
    September 2014
    August 2014
    July 2014
    June 2014
    May 2014
    March 2014
    February 2014
    October 2013
    July 2013
    June 2013

    Categories

    All
    16th Century
    Archery
    Avacal
    Awards
    Baby
    Beads
    Bears
    Bliaut
    Breastfeeding
    Brewing
    Calligraphy
    Classes Taught
    Dancing
    Darning
    Device
    Dogs
    Download
    Embroidery
    Events
    Food
    Garb
    Gardening
    Garlic
    Hair
    Handouts
    Handsewing
    Heraldry
    Hometown Pride
    Italian
    Kirtle
    Knitting
    Mending
    Needle Lace
    Norse
    Photos
    Planning
    Rapier
    Retinue
    Roman
    Scrolls
    Slug
    Spinning
    Sword And Horse
    Thrown Weapons
    Weaving

    RSS Feed

Powered by Create your own unique website with customizable templates.